Difference between revisions of "Alarm"
| Line 44: | Line 44: | ||
[[File:Block alarm.png|thumb|400px|Block alarm for WCU]] | [[File:Block alarm.png|thumb|400px|Block alarm for WCU]] | ||
[[File:New alarm block.png|thumb|left| | [[File:New alarm block.png|thumb|left|150px|Block alarm for WCU]] | ||
<br clear="all"> | <br clear="all"> | ||
Alarms can be blocked for a specific WCU, selected in the grid, or for all WCUs. If the logged in user is an administrator, the blockage can be put in place for all users or for the current user. If this is not the case, the user options are hidden and alarms can then only be blocked for that user. Additionally, it is possible to select one or several severeties and/or categories to block. If no severity and/or category is selected the alarms of all severities/categories will be blocked. End with naming the alarm block and save it. It will now appear in the list as presented in Fiugre XXX and from here it is possible to edit or delete it. Edit the block by either double-clicking the list tile or by pressing the pen icon. To delete it simply press the green alarm button. | Alarms can be blocked for a specific WCU, selected in the grid, or for all WCUs. If the logged in user is an administrator, the blockage can be put in place for all users or for the current user. If this is not the case, the user options are hidden and alarms can then only be blocked for that user. Additionally, it is possible to select one or several severeties and/or categories to block. If no severity and/or category is selected the alarms of all severities/categories will be blocked. End with naming the alarm block and save it. It will now appear in the list as presented in Fiugre XXX and from here it is possible to edit or delete it. Edit the block by either double-clicking the list tile or by pressing the pen icon. To delete it simply press the green alarm button. | ||
[[File:Block alarms list.png|thumb|left|150px|Block alarm for WCU]] | |||
<br clear="all"> | <br clear="all"> | ||
Revision as of 16:50, 23 April 2020
Alarms assists in keeping track of the health and status of individual WCUs. Alarms are created for individual WCUs if certain conditions are met. Typically these conditions are indicators that suggest that a resource has encountered a problem, or has entered a state that could potentially be problematic or harmful. When an alarm is registered it shows up in the WICE portal under the Administration/Alarms tab. Using the Alarm panel a user can get an overview of any WCUs that requires attention in the form of a list. By default, the alarms from the last 24 hours are kept in the list. The list is updated automatically with new alarms once every 10 minutes. Alarms already on the list are not removed, hence, over time there will be alarms from over 24 hours ago. A figure of the alarm panel is on the right. An alarm consists of five components: a resource identifier, a time, a message, a severity and a category.
A resource identifier can basically take any form, it is a string that identifies the source of the alarm. In the case to the right there are three distinct WCU resources with id wcu::04-1B-94-00-20-8C, wcu::00-09-D8-02-B7-4A and wcu::04-1B-94-00-20-76.
Time is simply at what time the alarm was triggered.
A message is a textual description of what happened. In this case it was because certificates are about to expire. The message looks as follows: 'Certificate expires on 20181019-184056 +02:00'.
Severity is a way to communicate the urgency of the alarm. Severity is currently divided into two types, Error and Warning. Error implies that something unexpected has happened which requires attention. Warning implies that a resource has entered a state that could potentially (but not necessarily) be harmful.
Category is a way to categorize an alarm. This is particularly useful for searching.
The remark column tells what has happened with the alarm. If it is empty, the alarm has simply been raised. If there are letter present the are either an A, which means acknowledged, or a G which means that the alarm situation has been resolved either as a consequence of the acknowledgement or automatically. An example of where it has automatically been resolved is the case where the SD card in the WCU has reached, let us say, an 85% usage degree and later when data is uploaded the usage degree drops below 80%. By hovering over the remark column you will be presented with the date and user of when an alarm was acknowledged and with a date if it was automatically closed.
At the top is a set of controls to filter alarms based on other criteria than the text in the columns. First out we have the checkbox "Use fetch interval". Checking this box enables the two items "Time unit" and "Time interval". This makes it possible to fetch alarms from more than 24 hours back. Its default setting is conveniently 24 hours. The time unit says how the number should be interpreted, e.g. changing the time unit to Days while leaving the time interval at 24 will mean to fetch alarms from 24 days back. Available time units are hours, days and months. Also, you choose to include closed alarm by checking the box "Include closed alarms" and/or including acknowledged alarms by checking "Include acknowledged alarms". It is only when either or both of these check boxes are checked that the remark column is populated.
Functions
There are a few functions in this panel. You can update an alarm list, reload the alarm list, acknowledge an alarm and search among the alarms in the table.
Update alarm list
A said earlier, the list is automatically updated every 10 minutes. But if you feel like not waiting, simply press the 'Update alarms' button. This will fetch new alarms from the server.
Reload alarm list
By pressing 'Reload alarms' button you will clear the current set of alarms and fetch a new set from the last 24 hours. Usually this is not needed but it is here for your convenience. The button needs to be pressed if you use and change the fetch interval.
Acknowledge alarm
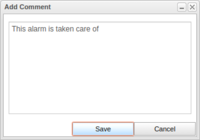
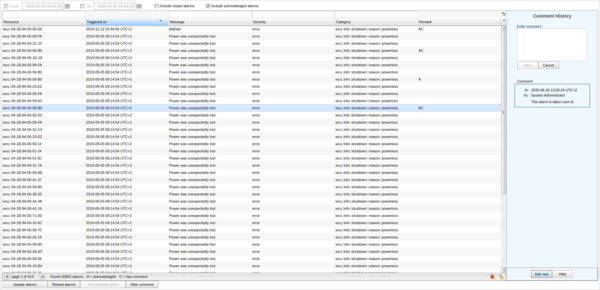
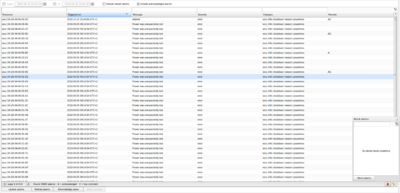
When alarm is 'taken care of' you can acknowledge this by pressing the button 'Acknowledge alarm'. When doing so a dialog pops up providing to opportunity of adding a comment, presented in Figure 'Comment dialog'. If there is no need to comment, simply leave the field empty and save. The alarm is thereafter marked as 'acknowledged' with the remark A and if a comment is added it is also 'commented' with the remark C. To view the existing comments for an acknowledged alarm, or to add new comments, mark it in the table and press the button 'Show comment'. This will result in a panel appearing to the right of the table as can be seen in Figure 'Comment history panel'.
The existing comments for the alarm is presented in a list in reversed chronological order along with date and user. To add a new comment press the 'Add new'-button at the bottom of the panel. The panel can be hidden again by either pressing the 'Hide'-button at the bottom of the panel or the 'Hide comment' button at the bottom of the alarm table.
Search alarm
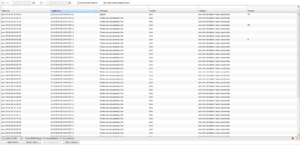
Over time, many alarms will accumulate and the list will be rather long. In order to find alarms of a specific category or for a specific resource, you can enter text in some of the filter column entries to filter the list. If you enter text in more than one of the filter entries an and-operation is used to filter the list. As an example see the figure to the right where a filter for WCUs having '20' in their id has been filtered for. As you can see, there are two WCUs that match this filter expression. No regular expression can be used here, it is a simple text search.
Alarm fetch interval
At the top is a set of controls to filter alarms based on other criteria than the text in the columns. First out we have the checkbox "Use fetch interval". Checking this box enables the two items "Time unit" and "Time interval". This makes it possible to fetch alarms from more than 24 hours back. Its default setting is conveniently 24 hours. The time unit says how the number should be interpreted, e.g. changing the time unit to Days while leaving the time interval at 24 will mean to fetch alarms from 24 days back. Available time units are hours, days and months. Also, you choose to include closed alarm by checking the box "Include closed alarms" and/or including acknowledged alarms by checking "Include acknowledged alarms". It is only when either or both of these check boxes are checked that the remark column is populated.
Block alarms
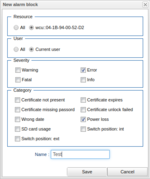
Sometimes it might not be relevant to show all existing alarms in the portal. For instance, when an alarm is being handled but is not yet ready to be acknowledged. In such cases it is possible to block a set of alarms which fulfill certain requirements using the red alarm block icon in the right bottom corner of the table, see Figure XXX. To block alarms for one specific WCU, select it in the grid before pressing this button. The appearing window lists all existing alarm blocks. To create a new blockage, press "Block alarms" and enter the conditions in the appearing dialog, an example of which is presented in Figure XXX.
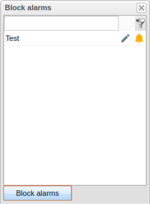
Alarms can be blocked for a specific WCU, selected in the grid, or for all WCUs. If the logged in user is an administrator, the blockage can be put in place for all users or for the current user. If this is not the case, the user options are hidden and alarms can then only be blocked for that user. Additionally, it is possible to select one or several severeties and/or categories to block. If no severity and/or category is selected the alarms of all severities/categories will be blocked. End with naming the alarm block and save it. It will now appear in the list as presented in Fiugre XXX and from here it is possible to edit or delete it. Edit the block by either double-clicking the list tile or by pressing the pen icon. To delete it simply press the green alarm button.
Available alarms
Presented below is the set of alarms currently available.
Certificate expires
This alarm is identified with 'wcu::info::cert::expire'. Currently, alarms start to appear from 30 days of certificate expiry date. The alarm is triggered at most once per 24 hours.
Certificate not present
This alarm is identified with 'wcu::info::cert::not_present'. It means there is no certificate at all on the WCU. The alarm is automatically closed when the WCU reports that there is a certificate installed on the WCU. It is triggered at most once per 24 hours.
Certificate password missing
The alarm is identified with 'wcu::info::cert::password::missing'. There is a certificate on the WCU and the private key is encrypted but there is no password supplied to decrypt it with. As soon as correct a password is supplied this alarm will be automatically closed.
Certificate unlock failed
The alarm is identified with 'wcu::info::cert::unlock::failed'. The most common problem to this alarm is that the wrong password has been supplied to decrypt the private key. As soon as correct a password is supplied this alarm will be automatically closed.
Sdcard usage
The alarm is identified with 'wcu::info::sdcard::use_percent'. An alarm is raised, currently, when the usage percentage of the SD card on the WCU is 80% or more. Alarms for this are triggered at most once every 24 hours. If the usage percentage is 95% or more, an alarm can be triggered up to once every 10 minutes. Once the usage percentage drops below 80% alarms are automatically closed.
Switch in INT position
The alarm is identified with 'wcu::info::start_switch::int'. An alarm is raised when the WCU reports that the switch is in the int position. It is automatically closed when the WCU reports that the switch is in position ext.
