Difference between revisions of "Vehicle Profiles"
| Line 58: | Line 58: | ||
* FIBEX - describing Flexray interfaces | * FIBEX - describing Flexray interfaces | ||
* A2L - describing ECU interfaces | * A2L - describing ECU interfaces | ||
* ECU Diagnostics (e.g. sddb-files) - provides which ECUs that are available for creating diagnostic templates | * ECU Diagnostics (e.g. sddb-files) - provides which ECUs that are available for creating [[Vehicle_Profiles#Diagnostic_templates_-_Manage_active_signals_connected_to_the_vehicle_profile|diagnostic templates]]. | ||
=== Upload new Description file === | === Upload new Description file === | ||
Revision as of 12:22, 4 October 2022
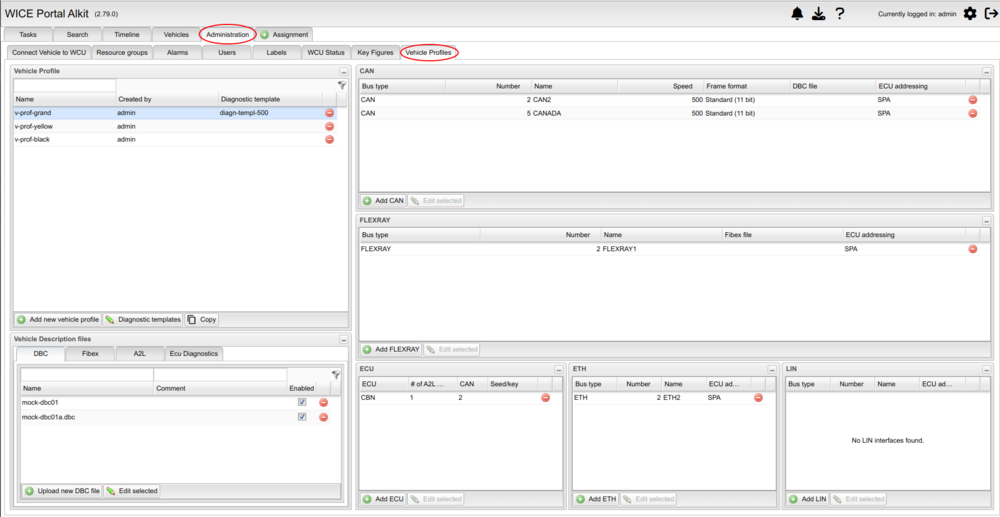
As an administrator, it is possible to define vehicle profiles from version 2.45 of the WICE portal. The vehicle profiles panel is located in the the administration tab as can be seen in Figure "Vehicle Profiles Panel".
Add a new vehicle profile
To add a new vehicle profile, click "Add new Vehicle Profile" in the "Vehicle Profiles" portlet to the left in the view. Choose a name and press enter. This will create a new vehicle profile with no interfaces defined.
Define CAN interfaces
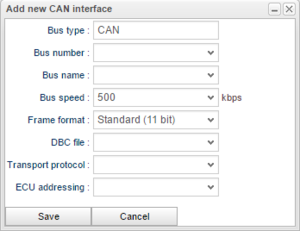
To define a new CAN interface for a vehicle profile, select the vehicle profile in the "Vehicle Profiles" portlet and then click "Add CAN" in the CAN portlet. This will open up the dialog as can be seen in Figure "Add CAN Dialog".
The majority of the interface attributes should be self explanatory but the DBC file may need some clarification.
Select DBC file
A CAN bus needs to be associated with a DBC file and when defining a CAN interface one have the option to select an already upload DBC file or upload a new one. Uploading DBC files can be done via the DBC files portlet (described in #Manage DBC files) or directly in the select DBC files grid shown in Figure "Select DBC Files Grid".
Define ECU interfaces
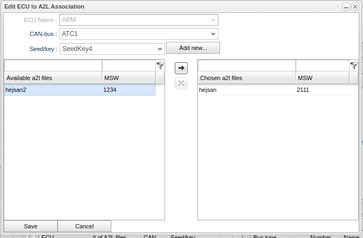
ECU interfaces are connected to a CAN interface. When adding a new ECU you will first be prompted to choose ECU name. The ECU names presented here are those ECU names that have a A2L file associated with them. When a ECU name is chosen, the available A2L files for that ECU are displayed and can be chosen. Drag and drop is supported when choosing files. You may choose multiple files per ECU. It is possible to add a seed/key to ECUs individually. The value of each Seed/Key is never displayed for the user as it can be considered confidential.
Define Flexray interfaces
The interfaces are similar to the CAN interfaces.
Define ETH interfaces
The interfaces are similar to the CAN interfaces.
Define LIN interfaces
The interfaces are similiar to the CAN interfaces.
Copy / Create new vehicle profile from an existing one
It is possible to create a new vehicle profile based on an existing one by selecting the vehicle profile you want to create the new vehicle profile from and then clicking Copy. You will now get a new vehicle profile named "Original name - Copy"
Diagnostic templates - Manage active signals connected to the vehicle profile
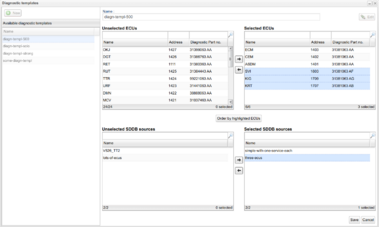
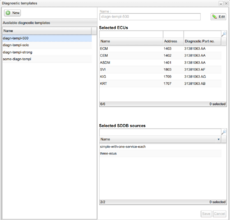
Decide which ECUs shall be connected to the vehicle profile for when measuring active signals (diagnostics). Either by adding ECUs manually or by picking from uploaded description files (see The ECU Diagnostics Tab for how to upload).
Multiple files and/or single picking of ECUs is possible. The choice is then saved as a Diagnostic template and can be reused by other vehicle profiles.
How to create/edit a Diagnostic template:
- Upload description files in The ECU Diagnostics Tab to make files and ECUs available.
- In the “Vehicle Profiles” tab - in the “Vehicle Profile”-section - find the vehicle profile you want to connect a description file to and select it or do not select any if only editing/viewing Diagnostic templates is desired.
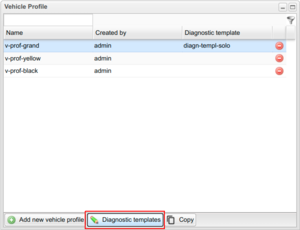
- Click on “Diagnostic template”.
- Choose an already made template, create a new or edit an existing.
- When in create-/edit-mode - move ECUs/files from left to right to select them and vice versa.
- Save any changes that was made.
- If a vehicle profile was selected in step 2: Click "Choose diagnostic template" to associate a template with the selected vehicle profile.
Manage Description files
The "Description files" portlet let the user upload, change or remove description files. These files are used to describe the vehicle. Supported description files are:
- DBC - describing CAN interfaces
- FIBEX - describing Flexray interfaces
- A2L - describing ECU interfaces
- ECU Diagnostics (e.g. sddb-files) - provides which ECUs that are available for creating diagnostic templates.
Upload new Description file
To upload a new Description file, click the "Upload new file" button and choose the file to upload.
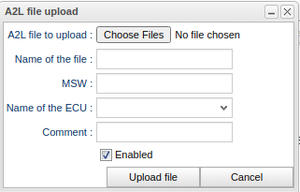
Upload A2L file
When uploading an A2L file there is the possibility to specify file version. This can be used to validate if a created Signal Reader and Area5 assignment can run on a given WCU.
There is also the possibility to specify which ECU name that the A2L file. This must be specified and cannot be edited later so make sure you choose the correct ECU. The list you are presented with when choosing ECU name
are the ECU names that have been found in uploaded ECU diagnostic files.
Edit Description file
To edit an uploaded Description file, select the Description file and click "Edit selected". A new window will pop up which let you do the following:
Replace Description file:
Replace the current Description file with another file.
Change name:
Change the name that references the Description file in the Description file.
Comment:
Add a comment to the Description file.
Enable/disable:
Enable/disable the Description file.
