New features in v2.43
This page lists new and changed features in version 2.43 of the WICE Portal.
New panel for searching files
The previous "Search" tab has been renamed to "Tasks" and works exactly as before. The new search tab is a more free form of searching as the search can be made without having to refer a set of assignments.
Read more about it in the page for the new search tab.
Changes to the IO tab in the WCU configuration
The check boxes to the left of each CAN and eth channel has been removed as can be seen in illustration "Removed check boxes". The reason is that the enabling and disabling of the channel only made the channel available/unavailable for new mappings in the new Mappings window. The enabling and disabling had no effects on the WCU side. The 2.42 version of the tab can for comparison be seen in "2.42 version of the tab".
CAN listen only
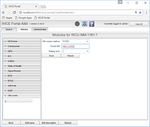
If the current WCU has software version ≥ 2.43.0 and the platform type is MX4 it is possible to set the CAN channel as "listen only" which is illustrated in illutration "CAN listen only". If this check box is ticked it means that no diagnostic questions can be sent to the car.
VIN reader module
The VIN reader is now implemented as a module and can be configured in the Vehicles#Modules section. The current VIN reader methods are OBD2, SPA29, SPA11 and FIXED. If FIXED is chosen, an extra field is visible where you write the desired VIN number.
SoftHub assignments
The New task window is extended with a new tab which makes it possible to create SoftHub assignments. This is illustrated in illustration "SoftHub assignments".
Batch update WCU Name and WCU Comment
Comma separated text files can be used to update the 'WCU Name' and 'WCU Comment' for multiple WCUs. Read more about it The Portal Administrator View/Upload WCU file
Enable M2M interface login
In the The_Portal_Administrator_View#The_Edit_User_Dialog a user can be enabled to also get access to the M2M interface. Similarly, a user can be set to only have access to the M2M interface and not be able to login via the Web GUI. An illustration of this feature can be seen in "Enable M2M interface".
Select roles for user
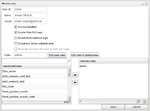
An easier way to select roles for a user is in place. Instead of selecting roles from a drop down menu, the desired roles can now be filtered out from the collection of all available roles and then be added to a list of selected roles by simple drag and drop. An illustration can be seen in "Edit user roles".
It is also possible to copy a list of selected roles as text and save it locally in a text file. The list can later be used when assigning the same roles for another user which will greatly speed up the assigning roles process. These features are accessible through the two icons in the lower right corner of the "Selected roles" widget.
View and get log files for assignment
In the result files view it is now possible to show the log files that were produced from the creation of the result file till 2 hours after.
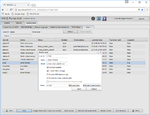
To view the produced log files during a measurement, select the result file(s) and then press "View log files" or "Get log files". The later starts a compilation of all related log files and makes them available for download . "View log files" takes you to a another view where each log file can be read directly from the web interface.
Select UD-signals for monitoring
For Signal reader it is now possible to select UD-signals for monitoring.
New panel for plotting MDF signals
A new panel is in place for plotting MDF signals. Read more about in the page Plot MDF signals.
Monitor signals for SignalReader assignment
The WCU monitoring for signal reader assignments is now using a graph to plot instead of showing the signals in a table. Read more about monitor signals in the page Monitor signals.
Show position for a resource group
It is now also possible to show the position for a resource group. To show the position for all resources in the resource group, select the group in the Vehicles tab and click "Show position"


