Difference between revisions of "The Portal User View"
Alkitjohan (talk | contribs) |
Alkitjohan (talk | contribs) |
||
| Line 1: | Line 1: | ||
This section will explain all panels and dialog in depth. Both regarding how you use it but also | This section will explain all panels and dialog in depth. Both regarding how you use it but also | ||
the limitations and some reasons to why it looks like it does. | the limitations and some reasons to why it looks like it does. | ||
Section 3.1 will describe the meaning of the | Section 3.1 will describe the meaning of the top level panels. In section 3.2 through 3.5 each | ||
top level panel will be described in detail. | top level panel will be described in detail. | ||
==Top level tabs== | ==Top level tabs== | ||
<div class="mw-collapsible"> | |||
<div class="mw-collapsible-toggle toccolours" style="float: none;"> | |||
'''The following applies to if you are using version <span style="color:#00ff00">2.40</span> of the WiCE portal:'''</div> | |||
<div class="mw-collapsible-content"> | |||
On the top level there are three different tabs to choose from. From left to right they are: | |||
#'''Search Tasks''' The tab is self explanatory to the extent that this is what you really do here, search among tasks and create new tasks. | |||
#'''Vehicles''' Manages your vehicles. As vehicles belong to users of the system, you need to assign a vehicle to yourself before you initiate tasks running on it. You can also deassign vehicles when you are finished with them. | |||
#'''Administration''' In this tab you can administer your name, email-address, password and a few other things. | |||
With these three tabs you can do all the work that is needed to start, stop and handle data to | |||
and from vehicles. A figure of the tabs is presented in Illustration 11 below. | |||
[[File:Illustration11 v240.png|frame|left|Illustration 11: The three tabs shown to a user.]] | |||
<br clear="all"> | |||
</div> | |||
</div> | |||
<div class="mw-collapsible mw-collapsed"> | |||
<div class="mw-collapsible-toggle toccolours" style="float: none;"> | |||
'''The following (click to collapse) applies to if you are using version <span style="color:#ff0000">2.39</span> of the WiCE portal:'''</div> | |||
<div class="mw-collapsible-content"> | |||
On the top level there are four different tabs to choose from. From left to right they are: | On the top level there are four different tabs to choose from. From left to right they are: | ||
#'''Active Tasks''' This tab represents the tasks that the user has started and at least one of tasks in the car is in a running, pending or error state. When all car tasks are in a stopped state, that task is removed from the list of active tasks. With this strategy you can be sure that once a task appears in the list, not all assignments have status stopped. | #'''Active Tasks''' This tab represents the tasks that the user has started and at least one of tasks in the car is in a running, pending or error state. When all car tasks are in a stopped state, that task is removed from the list of active tasks. With this strategy you can be sure that once a task appears in the list, not all assignments have status stopped. | ||
| Line 15: | Line 34: | ||
[[File:Illustration11.png|frame|left|Illustration 11: The four tabs shown to a user.]] | [[File:Illustration11.png|frame|left|Illustration 11: The four tabs shown to a user.]] | ||
</div> | |||
<br clear="all"> | <br clear="all"> | ||
Revision as of 14:38, 15 December 2015
This section will explain all panels and dialog in depth. Both regarding how you use it but also the limitations and some reasons to why it looks like it does. Section 3.1 will describe the meaning of the top level panels. In section 3.2 through 3.5 each top level panel will be described in detail.
Top level tabs
On the top level there are three different tabs to choose from. From left to right they are:
- Search Tasks The tab is self explanatory to the extent that this is what you really do here, search among tasks and create new tasks.
- Vehicles Manages your vehicles. As vehicles belong to users of the system, you need to assign a vehicle to yourself before you initiate tasks running on it. You can also deassign vehicles when you are finished with them.
- Administration In this tab you can administer your name, email-address, password and a few other things.
With these three tabs you can do all the work that is needed to start, stop and handle data to and from vehicles. A figure of the tabs is presented in Illustration 11 below.
On the top level there are four different tabs to choose from. From left to right they are:
- Active Tasks This tab represents the tasks that the user has started and at least one of tasks in the car is in a running, pending or error state. When all car tasks are in a stopped state, that task is removed from the list of active tasks. With this strategy you can be sure that once a task appears in the list, not all assignments have status stopped.
- Search Tasks The tab is self explanatory to the extent that this is what you really do here, search among tasks.
- Vehicles Manages your vehicles. As vehicles belong to users of the system, you need to assign a vehicle to yourself before you initiate tasks running on it. You can also deassign vehicles when you are finished with them.
- Administration In this tab you can administer your name, email-address, password and a few other things.
With these four tabs you can do all the work that is needed to start, stop and handle data to and from vehicles. A figure of the tabs is presented in Illustration 11 below.
Active Tasks Tab
Search Tab
The 'Search' tab makes it possible to search for and download result files and log files without first searching for a specific task. The tab is split into three portlets where each portlet can be expanded or minimized to make more space for the other windows.
The portlets are Search, Results and Selected downloads where each one has its own section on this page.
Search
The search portlet is where constraints are added to the search query.
Filename:
Filename can be full filename like "ABC_123.dat" or some regular expression that matches a part of a filename.
Measurement date:
By default to is set to today's date and the time when the page last was refreshed and from is set to (to - 7 days).
WCUs:
This widget allows the user to filter WCUs on various search criteria. The default search criteria is 'WCU ID matches expression .*' which means that we will search on every WCU the current logged in user has access to. If the current user is an admin, we will search for all WCUs in the system. If the current user is a restricted user with access to only 10 WCUs, we will search for only those 10 WCUs.
The currently available WCU attributes to filter on is: WCU ID, Software version, Description and WCU Name
Operators:
Each search criteria has at least two operators; 'matches expression' and 'equals'.
Matches expression:
'Matches expression' means that the inserted value will be treated as a regular expression.
Equals:
'Equals means that the chosen attribute has to exactly match the inserted value.
Is one of:
For the attributes 'WCU ID' and 'WCU Name' there is an additional operator 'is one of'. When choosing this operator, the value text field is replaced by a combined search and drop down list which is populated be either all WCU IDs or WCU Names the currently logged in user has access to. One can use this operator to conveniently filter out a few WCUs where it's a non trivial task to write a regular expression that only matches the wanted wcus.
Advanced filter:
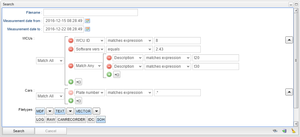
The WCUs widget allows the user build advanced nestled filters which is illustrated in the Figure "Advanced Filter".
In this example we filter "all wcus that matches expression '8' " AND "software version equals '2.43.0' " AND "description matches expression 'T20' or 'T30' ".
Cars:
This widget is very similar to the WCUs widget. Default search criteria is "Plate number matches expression .*" which basically means that we don't put any constraints on cars.
The currently available Car attributes to filter on is: Description, Plate number, Project, Proto number, Series, TSU and VIN.
Labels:
The labels section allows the user to search for result files from tasks matching the selected labels. Labels on tasks means labels that was associated with the resource (WCU or car) when the task was created. Any labels added to the resource after the task was created can not be used here. In other words, no result files for label X will be found if label X was not associated with the resource before an task was started.File types:
The file types widget decides which file types we want to include in the search result. A file type is included in the result if the file type button in the window is toggled.
The file types 'MDF', 'TEXT' and 'VECTOR' has sub types. When toggling a button with sub types, this will enable/disable all sub types for that file type. If one only want to include a subset of the sub types, one can expand the file type and only choose the wanted sub type. If only a subset of the file sub types are selected, the file type button will be in the disabled state. If all file sub types for a file type is enabled, the file type will change to enabled state. An example can be seen in "Enable file types".
Aggregate results by:
This widget allows the user how the search results will be aggregated. Available choices are 'Day', 'Week'. 'Month' or 'Year', where 'Day' is the default option.
Results
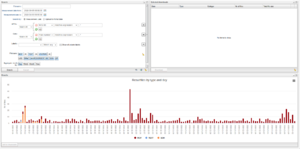
If the search query yielded any results these results are presented as a chart in the Results portlet, an example of which can be seen in the "Search Tab" illustration above.
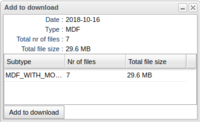
The X-axis depends on the chosen "Aggregate results by" in the Search portlet and the Y-axis shows the number of result files for each aggregation. The result files types that were found in the query are displayed in the legend below the chart. In the example we can see that we searched for 8 result file types but result contains 5 of them. If one clicks on any result bar in the chart a new window, "Add to download" will popup which can be seen in Figure "Add to Download". This window shows the date for the aggregation, which can be a day, a week, a month or a year, the file type (MDF in this case), the total number of files and the total size of all the files in the aggregation. The window also has a grid that shows if the aggregation consists of subsets of file sub types. In this example we only have the sub type "MDF_WITHOUT_MODULE_NAMES". When clicking the button "Add to download", this aggregation will be added to the "Selected downloads" portlet.
It is also possible to click the label of the X-axis to add all the file types for this date to "Selected downloads". In the same way it's doable to click the legend to add all found results of a particular file type to the "Selected downloads".
Selected downloads
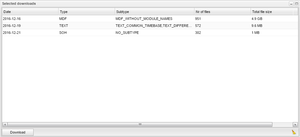
Selected downloads shows the all aggregations added from the Results chart. An example can be seen in Figure "Selected Downloads". The columns shows basically the same information as the "Add to download" window displays before the aggregations are added for download.
Clicking "Download" starts the compilation and the user is notified when the compilation is ready for download. The compilation can take quite some time if the total file size is > 100 mb.
Save, apply and reset search criteria
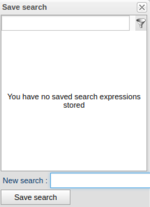
In the same way as for the 'Tasks' tab and the 'Vehicles' tab, search criteria can be saved as templates. To save the current search criteria as a template, use the middle of the three buttons to the right of the Search and Cancel buttons in the Search portlets. An example of this dialogue can be seen in Figure "Save Current Search Criteria".
The leftmost button applies previously saved criteria and the rightmost buttons resets the search criteria to default.
Vehicles Tab
Vehicles Tab
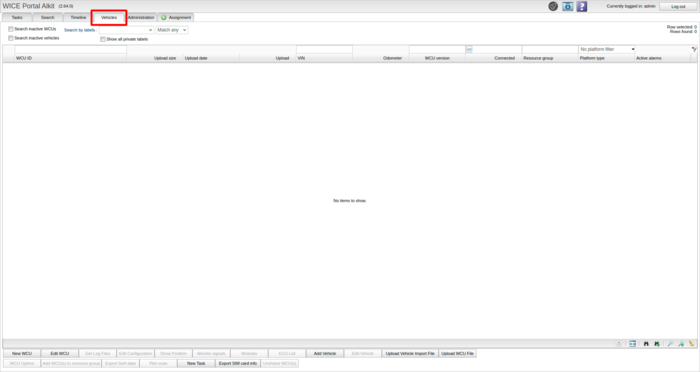
This view is used to handle the various vehicles that are assigned to you. A figure of this view is presented below in the Figure "Vehicles Tab". At the top, the red section, is a search area where you type in the criteria to be used for fetching the vehicles you are interested in. As you enter your criteria a row count is presented in the upper right area to show how many potential matches there are. The entries are also fetched as you type but only as many rows as fit your current view are fetched. As you scroll down more results will be fetched.
The number of possible columns to show is quite large. You can select which columns you wish to see by right clicking on the column header and select "Columns..". A small window will pop-up, in which you can select which columns should be visible in the table. These are the available columns:
| Active alarms | Presents a numeric summary of alarms. It displays the amount of errors and warnings. |
| Connected | Shows how many minutes have passed since the WCU made a connection to the WICE portal. |
| Distance | Shows the distance the car has been driven the last week. (SoH task specific) |
| Last DRO | Says when the DRO log file was last transferred to the portal. |
| Last log | Shows when the last log file was transferred to the portal. |
| Mileage | The column shows the mileage of the car. |
| Plate number | The plate number of the car where the WCU is mounted. |
| Platform type | Search WCU by platform type. |
| Project Id | Shows the project identification number. |
| Proto number | Shows the proto number. |
| Resource group | The resource group (if any) the WCU is part of. |
| Series | Shows the series attribute. |
| TSU | Shows the TSU identifier. |
| Upload | This column says how much data has been transferred from the WCU to the portal the last week. |
| Upload date | Contains which date the last upload was done |
| Upload size | Says what the size, in kilobytes, of the last data upload was. |
| Uptime | Shows how many hours the WCU been running the last week. |
| VIN | Shows the Vehicle Identification Number of the car where the WCU is mounted. |
| Voltage | The column shows the latest known battery voltage as reported by the CEM. |
| WCU ID | The MAC ID of the WCU. For example: AA-01-AA-01-AA-01. |
| WCU Description | A textual comment attached to the WCU. |
| WCU Firmware | Shows which firmware the WCU uses. |
| WCU voltage | Shows the voltage as measured by the WCU. |
| WCU Version | Shows which version the current WCU software has. |
| WCU storage usage | Shows the amount of storage available to store data on the WCU. |
| WCU name | Shows the name of the WCU |
Now, as there are so many columns present you have the option of selecting which ones you would like to see by right-clicking on the table header. If you would like your selection to be remembered between sessions, use the binocular icon with an add sign in bottom right corner in the Figure "Vehicles Tab". To save the currently entered search expression, similarly use the magnifying glass icon with an add sign. To read more about the view and search functionality, click here.
There is a concept called “resource groups” you should be aware of in this panel. A resource group is simply a way to refer to a group of resources (WCU, Car) collectively. An example is when creating tasks you can select a resource group instead of the individual WCU:s to start a new task. Also, when showing the positions on a map, you select a resource group and press “Show position”, all WCU:s in that resource group will show. To see which resources are in a resource group you press the triangle to the left of the row and the row opens up to show the individual members. To show the members in the view you can rightclick the entry and select the option “find members” from the menu.
When selecting a row in the table the selected row changes to a blue shade. You can modify the description of the WCU by clicking in the “Edit Description” button and entering a new description. You can search among the vehicles log files by clicking the “Get log files” button.
If you select one or more rows in the table, you can right click on the selected rows. This will display a context menu with several options, some of which are described here.
Go to Tasks Panel
This allows you to instantly jump to the tasks panel, which will automatically perform a search based on either the WCU or the car which the selected row represents.
Go to Search Panel
This allows you to instantly jump to the search panel. The search panel will automatically perform a search based on either the WCU or the car.
Go to Timeline
This allows you to jump to the Timeline-view, which will adjust itself to the WCU you have selected.
Go to alarms
Selecting this will take you to the alarms panel, where a search is conducted for all selected WCUs. This allows you to quickly see all alarms for a specific set of WCU resources. This works well together with the Active Alarms column (which you can read about further up this page), which tells you if a WCU has any active alarms. If a WCU has any active alarms, then using "go to alarms" will allow you to review those alarms in detail.
Upload vehicle pins
Selecting this will open a window where you may select a file to upload vehicle PINs. The expected structure of the file is one line per PIN where each line is of the format <ECU-ID (hexadecimal)>;<ECU name>;<Service Area (hexadecimal)>;<PIN>.
For example: 1D0D;HIA;0x5;AA:BB:CC:DD:EE will upload the pin AA:BB:CC:DD:EE for an ECU 0x1D0D (i.e. HIA) with service area 0x5. This PIN will then be associated to the vehicle connected to the WCU.
Remove WCU(s) from Resource Group
If WCUs which are included in a resource group are selected, the menu option "Remove WCU(s) from Resource Group" will appear. They do not have to be in the same resource group as each other. If a resource which do not fulfill this requirement is selected in addition, this option will not be visible.
Show WCU history
Selecting this shows a window with the history of the selected WCU. The following columns will be displayed in the window:
- Change date - Displays the date the WCU was changed.
- Description - Displays a description of the WCU.
- Active - Shows if the WCU is active or not.
- WCU ID - Shows the WCU ID.
- WCU name - Displays the WCU name.
- WCU version - The WCU version.
- WCU firmware version - The WCU firmware version.
- Changed by - The user who modified the WCU.
- Resource group - The resource group.
- ICCID - The SIM card installed.
- Modem ID - Shows the Modem ID. (This is hidden by default but can be revealed by right-clicking a column and selecting the "Columns" drop down menu.).
For the Show WCU history option to be available only a single WCU can be selected.
Trigger upload now
Momentarily stop the WCU, offload it and upload any data as soon as possible. This trigger button is only visible if the WCU state is in-operation and the WCU version is later then 2.39
Trigger reboot now
Reboots the trigger and WCU. This trigger button is only visible if the WCU state is in-operation and the WCU version is later then 2.39
Trigger collect and upload
This action will cause the task to momentarily stop and upload any data as soon as possible. This trigger button is only visible if the WCU state is in-operation and the WCU version is later then 2.45.
Trigger VIN readout
Trigger VIN readout, this action will cause the task to momentarily stop .This trigger button is only visible if the WCU state is in-operation and the WCU version is later then 2.65.
New task
To create a new task for all selected WCUs, click the button New Task. To learn more about creating each specific task see Creating a Task.
Upload Vehicle pins
Selecting this will open a window where you may select a file to upload vehicle PINs. The expected structure of the file is one line per PIN where each line is of the format <VIN>;<ECU-ID (hexadecimal)>;<ECU name>;<Service Area (hexadecimal)>;<PIN>.
For example: WICE_VIN_1;1D0D;HIA;0x5;AA:BB:CC:DD:EE will save the pin AA:BB:CC:DD:EE for the ECU 0x1D0D (i.e. HIA) with service area 0x5 and will be associated with the vehicle WICE_VIN_1.
Show the Vehicle Position
To see the last reported position of a vehicle, click the “Show Position” button which opens up a map view of where the vehicle was last known to be. You can view several vehicles simultaneously by ctrl- or shift-clicking the vehicles you are interested in.
If you want to know more about the "Show position"-tool you can read more about it here.
View Diagnostic Trouble Codes
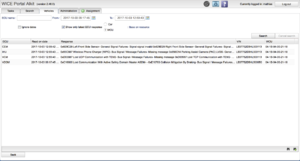
If an SoH task has been enabled to do Diagnostic Trouble Code (DTC) read-outs, you can view the trouble codes by selecting the vehicle you are interested in and push the button “View DTCs”. In Figure "Viewing Diagnostic Trouble Codes" you can see an example presentation of DTCs. There are five columns in the table. The leftmost is the name of the ECU issuing the DTC, next is the date and time when the trouble code was read-out, the actual DTC with clear text description, and thereafter the VIN and WCU id of the vehicle. If you click in the column for the actual trouble code, a dialog opens with that particular trouble codes. You can extend the size of the dialog in order to examine the trouble codes in more detail. You can also search the trouble codes as you can see at the top of Figure "Viewing Diagnostic Trouble Codes".
View ECU software
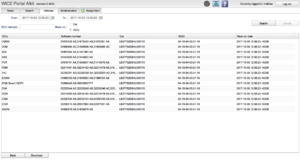
It is possible to see the ECU software number for each ECU in a vehicle. Press the button “ECU SW” after you have selected one vehicle. The following view will be shown. As you can see in Figure "ECU Software Versions", each ECU's software number is shown along with when it was read. You can download the list as a tab-separated text file if you press “Download”.
Get WCU Up-time
This function is used to get a compilation of the up-time of a set of vehicles during a particular time span. Select the WCUs you are interested in and the click the “Get WCU uptime” button. This brings up the dialog to the right.
Choose the dates you are interested by choosing a start and end date. Next you have the option of downloading a CSV file, or excel file. The up-time in that file is listed as hours up-time per day per WCU. The other option is to compile the up-time in a chart shown on screen. The up-time is averaged over the WCUs selected for each day. WCUs having no up-time at all are excluded from the compilation.
From version 2.42 there is a new feature to display the WCUs uptime based on the data sent from statusd. More info in WCU Uptime.
Export SoH Data
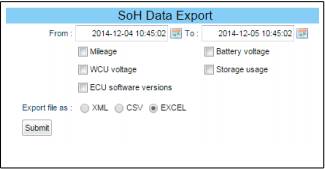
You can export data from SoH tasks to your local computer by using the function “Export SoH data”. Select the cars you are interested in as you can export for more than one car in one export. You select the dates you are interested in getting the data from. Check each item you are interested in. Currently you can select mileage, WCU voltage, ECU software versions, battery voltage, storage usage and diagnostic trouble codes. The file can be exported in CSV format (suitable for Excel and other spreadsheet applications) and in XML format.
Resource Groups
WCUs and cars can collectively be referred to as "resources". As such they can be grouped together and be handled collectively in order to ease the administration of a set of similar individuals. A resource group can consist of both cars and WCUs but usually only one type of resource is in a resource group.
You identify a resource group by a gray arrow like icon to the left in the table row. If you click the icon the entry opens up and makes room for showing which resources are part of the resource group.
From version 2.42 viewing the resource group's resources has been improved. More info can be found in Resource group's resources.
When a new task is created any resource groups assigned to you will show up in addition to individual WCUs. There is, however, no indication as to the particular entry is a resource group or not. If you select a resource group, the new task will be downloaded to all the WCUs that are part of the resource group. As a regular user you can not create and remove resource groups, only an administrator of the portal can do this.
From version 2.42 of the portal it is easier to search out members of resource groups using the "Resource group" column. When searching in this column one will get results that either matches the name of a resource group WCU or WCUs that are part of a resource group that matches the search criteria. In other words, if we search for "ABCD" we will get the resource group "ABCD" together with all WCUs that are part of the "ABCD" group.
This column can also be used to list all WCUs that are not part of any resource group. To perform this search, put "^$" in the "Resource group" column.
Alternatively, you can find the resource group that a WCU belongs to, by right-clicking the WCU and select "Search resource group".
Modules
If you have the right permission you will be able to view a WCU:s modules, and configure them. A module is a specific functionality of the WCU, such as a measurement tool. The available modules are:

