Signal Reader Assignment Wizard
The Signal Reader Assignment Wizard can be found under the tab Assignment and allows the user to create new assignments for signal reader directly on the portal. This page will guide you through the basics of using the wizard.
Choosing a Signal Source
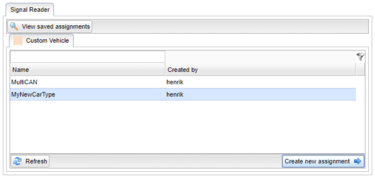
First, you must select a signal source to base your new assignment on. Today, only custom vehicle types can be used for this, see Figure 1. If you would like to edit the Custom Vehicle types or create a new one, this can be done by admins under the administration tab.
When you feel comfortable with which signal source you would like to use, double click it or select it and click Create new assignment.
Creating a new assignment
Now that you have chosen a signal source, you can start creating the assignment. The first tab that you are presented with is the Assignment global settings tab where you can add information about the assignment so that you can easily keep track of what this assignment is about. Creator and creation date are both automatically filled in and cannot be changed because of consistency.
Under the Measurements tab, see Figure 2, you are faced with a table of Measurement Setups and an information window. These measurement setups are the core of a signal reader assignment. They contain Triggers that activate and deactivate on certain conditions provided by the user. Each trigger can contain a Recorder that contains a list of certain signals that will be measured when the start condition for the respective trigger is met. A trigger can also be used to act as a setup switch.
Trigger
To add a trigger to a measurement setup, click the Add trigger button for the respective measurement setup. This will create a new Trigger in the trigger table in the respective measurement setup and the information window will be filled with new settings for this trigger for you to add.
Fill out the start condition for the trigger. This is easiest to do in the Edit expression window that you can get to by clicking one of the Edit buttons. To find a new signal to add a condition for, use the Add signal button. Here, you can browse all signals available for this assignment. Use the dropdown to browse signals from different can-busses and Wice generic internal signals. If you want to browse the signals currently in use in the assignment for the selected signal source, check the Search in assignment box. If you want more information about a signal, select it and click More info. When you have found the signal you want, double click it or select it and click Add signal. Now you can use the Operators list to add a condition for the signal, for example " > 0". When you are satisfied with the start condition, click Save to save the expression.
A stop condition is not required, but can be supplied to determine when the recording should stop. If the stop condition is not supplied, the settings for the recorder will tell when the recording should stop.
You can use the Setup switch to switch to/run another measurement setup when the start condition is met. Keep in mind though, that the setup switch will not run until all currently started recorders have at least fulfilled their minimum duration. A trigger with a recorder cannot have a setup switch, but the recorder can.
Recorder
By selecting the tab Recorder you can add a recorder to the trigger. This will populate the information window with settings for this recorder, starting with the signals to be recorded.
Signals
Click the Add Signal button to open a window to add signals for recording. This window is much like the window for adding signals for the trigger, only differing in the fact that you can select multiple signals in this window. The selected signals for this recorder are shown in the right table, see Figure 3. To add new signals to this table, you can either:
- Double click the signal,
- Drag and drop the signal
- Select the signal and click the right pointing arrow
Click the red symbol to the right of each signal to remove it. When you are done, click Ok to add the signals.
Now that you have added some signals, you can give them each a Skip factor, default 1, which is an integer that determines how often the signal should be recorded/stored when supplied. For example, a skip factor of 1 will record the signal every time it is supplied and a skip factor of 3 will record the signal every third sample.
Properties
Under the recorder tab Properties you can select the properties for the recorder.
Number of shots is an important factor for a recorder. A shot is the term used for a single recording and number of shots is therefore the number of times we should record. A shot is only started when the start trigger condition is met and will continue until any of these events occur:
- The recording fulfills the maximum duration.
- The recording fulfills the minimum duration and the stop trigger condition is met.
- The recording fulfills the minimum duration and a trigger start a setup switch.
- The recording fulfills the minimum duration and another recorder starts a setup switch.
- A setup switch is started manually.
- The assignment is stopped manually.
