The Portal Administrator View
An administrator can do everything a user can do and more. In addition to what a normal user can do, an administrator can create and modify users and stop tasks for any task. These new functions will be explained in the next three chapters.
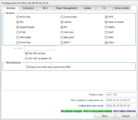
We will start with the Search tab where two more buttons are visible. Next is the Vehicles tab. Lastly is the Administration tab with five sub tabs consisting of: the Connect tab, the Archives tab the GDS/SDDB files tab, the Resource Groups tab and the Users tab.
The Tasks Tab


In addition to the functionality for an ordinary user, an administrator the administrator can search and view any user's task. Also, it has one more button present. An administrator can send a Force Stop command to any WCU.
Figure "Stopping Running Task" shows the "Stop assigment" button. This button is the same as for the ordinary user and is used to stop a running task. When a running task is stopped, it changes state to "Stop pending". This means that the portal is waiting for a stop message from the WCU before the state is changed to "Stopped" in the portal view. The administrator view's "Force Stop Task" button, which can be seen in Figure "Force Stop Task", forces a "Stop pending" task into "Stopped" state without waiting for the stop signal from the WCU.
For a portal of version 2.60 and forward, it is also possible for an administrator to remove all resultfiles for a selected task using the corresponding context menu option. When doing so, a confirmation dialog pops up to ensure that it is in fact the intended choice. Note that this option is disabled if multiple tasks are selected or if the selected task does not have any result files attached.
The Vehicles Tab
An administrator can do quite a lot of things in this view, an illustration of which is presented in Figure "The Administrator's Vehicles Tab". The table header along with the buttons “Edit Description” and “Get Log Files” are explained in the page for Vehicles.
At the bottom you have a set of buttons to aid in handling the WCUs. To add a new WCU to the portal, the “New” buttons opens up a dialog for that. The “Get Log Files” button fetches log files for the selected WCU from the portal.
The New WCU Dialog
There are two ways that a WCU can enter the portal. The first is if you click the “New WCU” button and the second is the first time a WCU connects to the portal it registers itself. Ideally you will never have to add a WCU to the portal but just as a safety step you have the opportunity to add it yourself. When clicking the “New WCU” button the dialog presented in in Figure "The Add New WCU Dialog".

You must enter the ID of the WCU as this is a unique identifier and you will be notified if the ID is already present on the portal. The description is optional but may be handy to remember which WCU it is.
The Edit WCU Dialog
To edit a WCU simply mark it in the table and press the button called "Edit WCU". This results in a dialog where the fields differ depending on editability. For one selected WCU these are the comment, name, whether it is active or not, the labels for the WCU or if it requires approved assignments. However, if the WCU has tasks which have status pending, running, warning or error (or corresponding partial statuses), the active option is disabled. This is also true if the WCU is connected to a vehicle or if it is included in a resource group. By checking "Require approved assignments" you can only add assignments that have been reviewed and then approved by the reviewers.

If the selected WCU is a resource group the dialog will appear as presented in Figure "Edit WCU Dialog". The difference here is the "Apply label to resource group's WCUs"checkbox. When this option is selected the labels selected in the "Manage labels"-selector are also added to the WCUs included in the resource group. It is, though, not possible to remove labels from the resource group's WCUs using this checkbox. To do so use instead the context menu options for label management.

It is also possible to edit multiple WCUs simultaneously. If several WCUs are selected the dialog presented in Figure "Edit Multiple WCUs" appear. This is only possible for the fields "Comment" and "Active" and these are enabled using the corresponding checkbox to the right. If one of the selected WCUs fulfill the conditions presented above for the disablement of the Active-option, it will not be possible to select the corresponding checkbox.

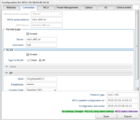
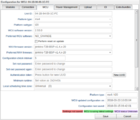
Edit the WCU Configuration
You can edit the configuration of the WCU from the portal. Simply click on Edit Configuration to open up the window in Figures "Edit Configuration: Modules", "Edit Configuration: Connection", "Edit Configuration: WCU", "Edit Configuration: Power Management", "Edit Configuration: Upload", "Edit Configuration: IO", and "Edit Configuration: Extra bundles". The WCU configuration window is divided into five tabs where each tab is described below.
Edit Configuration: Modules.
Edit Configuration: Connection.
Edit Configuration: WCU.

Edit configuration: Power Management
Edit Configuration: Upload.
Edit configuration: IO
Edit Configuration: Extra bundles.


Modules
The set of checkboxes for the different modules that are present are at the top. Check or uncheck these to tell the WCU if they are present or not. Disabling modules will speed up the boot process of the WCU (but will make the corresponding functionality unavailable).
To edit "Car type", click on the field where the car type is displayed to open the "Edit car" dialog. This dialog is described in section The_Portal_Administrator_View#The_Edit_Car_Dialog
The last three checkboxes, "Run IDC at boot", "Run IDC at ignition off" and "Enable VIN reader" are pretty much self-explanatory.
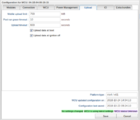
Connection
This tab can be seen in Figure "Edit Configuration: Connection" and the tab content is described here.
WCU
This tab can be seen in Figure "Edit Configuration: WCU".
- Unit ID
The automatically generated unique WCU identifier. The ID is immutable.
- Platform type
The WCU platform type.
- Platform subtype
The WCU platform subtype.
- WCU software version
This is the currently installed WCU software version.
- Preferred WCU software
This is the new preferred WCU software version to be installed. When updating to a new version, the configuration dialog will update itself immediately to reflect what is available in the new version, hence accordingly also when downgrading. This means that new settings regarding the WCU's modules will also be upgraded which makes it possible to edit the modules according to the new version. In addition, when creating new tasks, validation will be carried out to the new version and hence you will not have to wait for the WCU to be updated to the new version to use new features.
- Perform reset on update
Removes all data on the WCU when installing a new WCU software.
- MX4 firmware version
The currently installed MX4 firmware version.
- Preferred MX4 firmware
The new preferred MX4 firmware.
From version 2.40 of the WCU software, all WCUs report its platform type. The platform type determines, among other things, the number of available CAN buses in the IO tab. (see I/O configurations) Since a resource group is a collection of WCUs it has no platform type of its own to report. From version 2.41 of the portal the user has the option to set a fictive platform type for a resource group. This is also a prerequisite to also set the I/O configurations for a resource group. The platform type (and possibly subtype) is set in the WCU tab. If the resource group has members with other platform type(s) than the type that is about to be set, the user will get a warning.
If the platform type of the resource group differs from the platform type of its members the I/O tab will be disabled. This is also the case when the platform type of the resource group and one member is the same but another member has another platform type.
From version 2.42 it is possible to update the WCU root password. To update the password, write the new password in "Set root password" and save the configuration.
- WCU Local Scheduling Time Zone
For a WCU of version 2.53 or higher it is possible to configure a local time zone for the WCU using the option "Local scheduling time zone" presented in Figure "Edit Configuration: WCU". This field consist of a drop down menu displaying the selectable time zones, which are as follows:
- Universal
- Africa/Cairo
- America/Anchorage
- America/Caracas
- America/Chicago
- America/Denver
- America/Los_Angeles
- America/New_York
- America/Sao_Paulo
- Asia/Dhaka
- Asia/Dubai
- Asia/Hong_Kong
- Asia/Karachi
- Asia/Tokyo
- Australia/Adelaide
- Australia/Brisbane
- Australia/Darwin
- Australia/Sydney
- Europe/London
- Europe/Moscow
- Europe/Paris
The zone defined here will be enforced selecting "WCU local time" when scheduling a task, see description here.
- Blink Controller
For WCUs of version later than or equal to 2.54 it is possible to configure the blink controller for the WCU diods, which can be set to blink in different patterns to represent different WCU states. Selecting "Legacy" in the corresponding drop down menu will result in the WCU controlling the diods and the "DioIPD"-option means that the DioIPD will controll them.
- Enable NTP Server
It is possible to enable or disable the NTP server by the use of a checkbox named thereafter for WCUs of version 2.60 or later.
- WCU Certificate

If the WCU is version 2.52 or later you have an opportunity to update the WCU's certificate and related files. If the conditions mentioned are met you will see a checkbox saying "Update certificate related files", see Figure "Files for Certificate Update". When checking the checkbox, an additional three fields are revealed. They are:
- Certificate file, choose a certificate file to upload which is in PEM format.
- Private key file, choose a private key to upload in PEM format as well.
- Password file, choose a file with the password to the private key. The file should be plain text.
You must supply all three files.
In order to see what certificate is installed on the WCU at any time, there is text field called "Current fingerprint". If you have recently updated a WCUs certificate, you can by hovering over the field also see if the WCU is using the latest certificate. If this the case a message saying "Using latest certificate".
Renew WCU Certificate
It is possible to renew a WCU's certificate by selecting the checkbox "Renew certificate". Doing so will automatically issue a new certificate when the configuration is saved.
Enable PTP

From version 2.81.0 of the WCU software there support for starting a PTP daemon on the WCU in order to synchronize time between units connected to the WCU. The protocol is designed to attain a higher accuracy than when using NTP. When you enable the setting you must also select to which interface on the WCU the daemon should listen on. You can see what it looks like in the illustration on the right.
Power Management

This tab can be seen in Figure "Edit Configuration: Power Management" and the tab content is described below.
“Power mode” has two settings: "Sleep", Deep sleep" and "Cut-off". In cut-off mode, the WCU is not woken up at regular intervals to report battery voltage, GPS position etc.
In sleep mode, some more settings are visible which also can be seen in Figure "Edit Configuration: Power Management". You can select the WCU to remain unpowered by selecting "External cut-off", only available for the COMMITTO platform. In addition, you may enable the WCU's wake-up functionality. This function is simply made up of a cycle time called “Periodic wake-up time” and the corresponding “Periodic run-time”. The “Periodic run-time” determines how long time the WCU should be awake before going back to sleep. The “Periodic wake-up time” indicates the time for each new wake-up cycle.
From version 2.43 it is also possible to set power mode to "deep sleep" for WCUs running on platform MX4 T20/T30 and MX4 V61. The configuration is the same as for mode "sleep".
Example: A periodic run-time of 600 seconds means that the WCU will be alive for 600 seconds (10 minutes). A periodic wake-up time of 3600 seconds means that the WCU will start a new run-time (600 seconds in this case) every new hour. (3600 seconds = 60 min). The sleep time in each cycle is, for the general case, the wake-up time minus the run-time and in this example 3600 minus 600 = 3000 seconds (50 min). This example is illustrated in Figure "Perodic Wake-up".
From version 2.88.0 it is possible wake on a specific CAN frame ID. The settings are the same is for the canrecorder task. There it is possible to select one specific frame or several by separating them by “,”. It is also possible to select a range between frames by using “-”. The value can either be decimal or hexadecimal. A example of a filter: “1, 0x12-0xFF”
WMU's Power Management
If your Portal has WMU's enabled and you have added WMU's to the WCU Configuration in the I/O Configurations tab, then the Power Management controls "Power Mode" and "Wake on CAN" are present for each WMU with a tab of their own. These tabs are found at the top of the dialog window next to the WCU's Power Management tab.
Upload
This tab can be seen in Figure "Edit Configuration: Upload" and the tab content is described in the table below.
| Mobile upload limit | Defines the maximum data size that should be transferred via the mobile network. If the data size is larger than that the WCU will wait until a connection to a local network can be established. The size is in Mbytes. |
| Post run grace timeout | The number of seconds to wait before communicating with the portal, if the ignition is turned off. |
| Upload timeout | The maximum number of seconds the WCU should upload data before stopping. |
| Erase error code | If turned on the error codes in the vehicle will be reset. |
| Upload data at boot | Uploads data when the WCU boots up. |
| Upload data at ignition off | Uploads data when the ignition of the vehicle is turned off. |
| Upload periodically | Uploads data every 10 minutes. |
IO
Version >= 2.41 of the portal has a new tab named I/O. You can read more about in I/O_configurations.
Extra bundles
For more information about Extra bundles, click here.
From portal version 2.47 and if the WCU is running 2.47 (or is about to be upgraded to 2.47) there is a new tab "Extra bundles" in the WCU configuration window, see Figure "Edit Configuration: Extra bundles". In the tab, it is possible to select additional software to be installed on the WCU. The installation will start as soon as the WCU fetches the updated configuraton. This tab is only enabled if the current WCU is an MX4.
The Edit Vehicle Dialog


To edit the information about a car, press the “Edit Vehicle” button. The dialog in Figure "Edit One Vehicle" opens up.The one entry you can not edit is the VIN entry. If you need to edit that you must instead create a new car.
In order for the portal to be able to translate Diagnostic Trouble Codes into a human readable format, you must choose a diagnostic DB file to be used. It is important to select the correct one as the diagnostic trouble codes read out might be translated incorrectly or (more probable), not at all. It is also important to select the right type of vehicle using “Vehicle type”. This controls the number of CAN buses and the number of Ethernet networks, if any, in the vehicle. If the selected vehicle is connected to a WCU in a resource group, strict or not, this option is disabled. To enable it it either has to be disconnected from the WCU or the WCU must be excluded from its resource group. The “Active” check box controls whether the vehicle should show up in tables and searches in general concerning cars. A vehicle can never be removed as it has probably been involved in measurements but to recall an inactivated vehicle you must actively select to view inactivated vehicles. However, if the vehicle is connected to a WCU this option will be disabled from editing. In order to deactivate such a vehicle you need to first disconnect it from the WCU. It is possible to choose not to update history vehicles with the provided changes. This option should only used in specific cases and with a well grounded reason.
It is possible to update several vehicles at once by selecting multiple vehicles and then press the “Edit Vehicle” button. By doing this you can selectively make changes to attributes, except for the VIN and plate number, for all the selected vehicles at once. This is achieved using the extended dialog presented in Figure "Edit Several Vehicles". The options which are to be edited for all vehicles must be selected using the corresponding checkbox. If not, the option is disabled, as for instance the "Comment"-option in the "Edit Several Vehicles"-figure.
Add Vehicle Dialog


Usually you do not have to create vehicles manually, they are created automatically by the WCU if they are not found. It is possible, however, to create a vehicle manually using the portal by pressing the button "Add Vehicle" in the vehicles panel. By doing so you will be presented with the dialog found on the right. Here you can set a number of attributes. Important to remember is that the field VIN is mandatory and must be unique among all vehicles registered on the portal. From version 2.57 of the portal the checkbox "Generate unique VIN" is present to the right of the input field VIN. By checking that box a unique VIN will be generated once you save the vehicle. The name consists of a prefix, which is centrally preconfigured, and a monotonically increasing integer number. After pressing save you will be presented with the following dialog (in the right below).
Here you have the opportunity to inspect the generated VIN and your other settings. You can either select to dismiss the dialog or go to the result which means that the newly created vehicle will be presented in the table in the vehicles panel.
Upload a Vehicle Import File
It is possible to import a file that describes a set of vehicles. It can consist of both new vehicles and vehicles already in the database that might need to be updated with new information.
A vehicle import file consists of a comma separated file where each line describes a vehicle. The first line of the file must look as follows:
VIN,regNr,description,project,protoNumber,tsu,series
There are seven attributes currently. When uploading the file you have a choice of modifying existing vehicles in the portal. If you do not check this box and there are vehicles that already exist, the import will fail.
Show or export SIM card ID
The SIM card ID for a single WCU can be seen when right-clicking on a WCU in the Vehicles tab and selecting "Show info".
SIM card ID's for one or multiple WCUs can also be exported as a csv file. Select the WCUs you are interested in (in the Vehicles tab) and press the button "Export SIM card info" located in the bottom row below the Vehicles grid. The downloaded file will contain five columns: WCU ID, WCU Name, RegNr (Plate nr), VIN and SIM Card ID.
Upload WCU file
The WCU attributes 'WCU Name' and 'WCU Comment' can from version 2.43 of the portal be updated for multiple WCUs via a comma separated txt/xls/xlsx file. Click the "Upload WCU File" button to open up the import file to upload dialog.
The uploaded file has the following requirements:
- The file must have two mandatory columns with the names 'WCU ID' and 'WCU Name'.
- Furthermore, an optional column named 'Comments' can be added.
- The columns should be in said order.
- The amount of columns on each row must match the amount of columns in the header.
- The columns should be separated by using tab or by a comma.
If there is a 'Comment' column and a blank comment on a row then the old comment, if any, for the specific WCU will be kept.
To remove a comment from a WCU simply check the checkbox for erasing comments. Doing so will result in that empty comments in the uploaded file will erase current comments.
Upload a file describing ECU pin codes for a vehicle

ECU pin codes can be specific for a vehicle. This makes it possible to create an SWDL assignment for multiple vehicles in one go. In order for this to work you must first prepare all such vehicles by uploading a file describing the different pin codes. When using the button "Upload Vehicles pins" multiple vehicles can be described in one file. The format of such a file is row based where each row should be vin;ecu;pin. The ecu field is the hexadecimal address the ECU. When pressing the button "Upload Vehicles pins" you will be presented with the dialog found to the right.

There is also on option available with a context menu (right click a row) where a singe vehicle is targeted. The format of the file is the same except that no vin should be in the file.
Shelve and Unshelve a WCU
When a WCU is shelved it is disconnected from its car, if connected, and removed from its resource group, if any. In addition all active measure tasks are set to stopped pending and the system label shelving_in_progress is attached. This label will remain until all tasks for the WCU have status Stopped and all gathered measure data is uploaded to the portal after of which the label is replaced by the system label shelving_done. In this final stage it is also possible to unshelve the WCU using the corresponding button and thus removing the shelving_done-label. Note that when a WCU either has shelving in progress or is shelved it is no longer possible to add new measure tasks.
It is possible to "Unshelve" one or multiple WCUs using the "Unshelve"-button in the Vehicles-tab. If the choices does not apply to the set of selected resources the button is disabled. It is possible to unshelve a WCU from any of the existing shelving states; shelving in progress, shelved, shelving refurbish in progress or refurbished. Note that the user must have the role wcu:shelving:write to be able to perform this operation.
Resource Groups
As described above in Vehicles#Resource Groups, you can define a set of resource groups in order to easily handle large groups of resources collectively. An example is if you have 100 WCUs in such a resource group and you would like to edit the configuration for all WCUs. Instead of having to open the configuration for each individual WCU, you simply open the configuration for the resource group, do your edits and when you press save, the configuration will be saved to all WCUs in one go. Resource groups are created in the Resource groups panel, described further below.

Add a resource to a resource group
To add resources to a resource group you start by selecting the resources you are interested in adding to a resource group.
When you are satisfied with your selection, press the button “Add WCU(s) to resource group”. Pressing this button will show the dialog to the left. The group box will list the available groups. If you know the name of the resource group you can type the name and as you type the box will show names that fit what you type.
The two check boxes requires a deeper discussion. Assume you have a resource group that has been used for some time. A new WCU is registered on the portal and you would like to add that WCU to your group. A common situation is that you would like that WCU to be configured the same way as the rest of the WCUs in the resource group. This is accomplished by checking “Update WCU configuration”. If this requires an update of the WCU software it will automatically be taken care of. Also, a WCU comes pre-configured with a set of modules. Usually you will probably want to update the module configurations as well. In order to do so, it is required that you also update the WCU-configuration.
If you leave the "Update WCU configuration" and/or "Update module configuration" unchecked, that selection of only in this instant. If you later change the resource group configuration (or module configuration), that change will be applied to all resources in the group.

Moving a resource between resource groups
In this same dialog it is also possible to move WCUs between resource groups. Just as with adding a WCU to a resource group, select the WCU(s) you wish to move and press the "Add WCU(s) to resource group" button. If a WCU already belongs to a resource group, that resource group is listed in the grid alongside the WCU. Select the desired resource group you wish to move the WCU to, in the group box and press the "Save" button. An information dialog will pop up, informing you that a WCU will move from one resource group to another. Press "OK" to confirm the WCU moving to a new resource group or press "Cancel" to return to the previous dialog.

Requirements for moving or adding a resource to a strict resource group
When adding or moving WCUs to a strict resource group, it is required that the WCU shares the same platform type (and platform subtype, should one exist) and that a car is connected to the WCU (see strict resource groups). Furthermore, updating the WCU-configuration and the module configurations are mandatory and, as such, these options are set and not able to be changed.
Modules for the WCU

Each WCU supports a number of modules. The modules are software components realizing specific functions, such as a measurement tool, a data source or software component. Some modules correspond to external measurement devices connected to the WCU, whereas other are built-in. This makes it possible to add new peripherals to the WCU for handling various tasks in acquiring measured data from a car. The set of currently available modules are:
- Area5
- Audio
- Blue piraT
- Canrecorder
- DLT
- DoIP
- ETAS
- Ethernet capture
- GPS
- IDC
- IPEmotion RT
- LPD
- M-log
- MCD-Hub (deprecated)
- MQTT
- Rapid Prototyping (RP)
- Signal Reader
- Smart Eye
- Soft-Hub
- State of Health (SoH)
- Software Download (SWDL)
- Uptime
- Video
- Vinreader
To deal with each module's configuration a new view is presented below. To open this view, press the button “Modules” as shown in Figure "The Administrator's Vehicles Tab" in #The Vehicles Tab. In Figure "Selecting Tool Configurations" there are a set of tools present where each type is grouped on the left side using a stack panel. Show the Signal Reader settings by selecting the Signal Reader stack and select the Canrecorder stack to see the canrecorder settings and so forth.
Each tool has its own entry in each of the stacks. In Figure "Handling Tool Configurations" there is only one MCD-Hub present and it is “0”. Each tool is recognized with a tool ID which is set by the WCU. This ID is usually not descriptive and therefore you have the possibility to set a name of your likings. Change the name by pressing the button “Edit name”. You can also add a description to the tool that shows up as a “tool tip” when hovering over the name of the selected tool. Analogously, change the description by pressing the button “Edit description”. To reload the set of available tools press the “Reload” button.
Below each tool configuration there messages are presented to indicate the module status. The different types of which are presented in Figure "Module Status Indicators".

Module Status Indicators


When a module is selected, or reloaded, it will say "No settings saved". In this mode the save-button is disabled and it will not be enabled until one of the settings is edited. Then the message "Settings not saved" appears until the save button is pressed. When the configuration is successfully saved, the status is updated to "Settings saved" and the Save-button is once again disabled. In addition, if there is a pending upgrade of the tool, this also will be indicated below the configuration panel.
In addition to the module status indicator above, a date and user will show when the configuration was changed and by whom.
Configure the Arcos Module

As of version 2.71 of the portal, Arcos tasks can be created and these are the configurations variables that can be configured:
- Username
- Password
- Frontend number
- Current firmware
- Desired firmware
- Debug level
When configuring the module on a resource group level the username and password will be set on all resources in the resource group. The frontend number however, will not be updated on all the resources but rather retain the individual settings made on each resource.
In order for the "Current firmware" and "Desired firmware" field to show the WCU software version needs to be 2.85.0 or later.
Configure the Area5 Module
As of version 2.61 of the portal, it is possible to create Area5 tasks. The Area5 tool only has one configuration, the debug level, which determines the level of logging during the execution of the Area5 tasks.
Configure the Audio Module
The audio module can be configured both regarding recording and monitoring. The recording settings refer to what is recorded on the WCU to disc to be uploaded, whereas the monitoring settings refer to the parameters used for monitoring live audio.
The available recording settings are:
- Device, can be set to internal or USB, where default is internal
- Channels, can be set to either 1 (mono) or 2 (stereo), default is 2
- Sample rate, can be set to 48000, 44100, 16000 or 8000. Default is 48000. The unit is Hz.
- Recording volume, can be set to a value between 0 and 100, where default is 95.
The available monitoring settings are:
- Channels, 1 (mono) or 2 (stereo). Default is 1.
- Codec, LPCM, GSM or G.711. Default is LPCM (Linear PCM 16 bits per sample, 16 kHz).
- Destination IP address. This is the address to where the audio is sent for live monitoring.
- Enable monitoring. In order to monitor audio live for an audio task, the module must be enabled for monitoring. If the task is enabled for monitoring but the module is not, no audio can be monitored live. Default is disabled.
It is possible to have four audio sources simultaneously. To add a new source, simply press the button "Add audio source" and the corresponding settings will appear in a new tab. If there already is an audio source with device set to internal, the new device will have default device USB. However, if there is no previous device set to internal, this will be the default option.
Configure the Blue piraT Module
As of version 2.44 of the portal it is possible to create blue piraT tasks. The blue piraT tool only has one configuration, the debug level, which determines the level of logging during the execution of the blue piraT tasks.
Configure the Canrecorder Module
The configurable settings for the Canrecorder module can be seen in Figure "Settings for the Canrecorder module".

In the aforementioned figure, it is clear that this panel can be used to edit the speed on both the high- and low-speed CAN-buses. It is also possible to set the date for which the update is valid, the canrecorder version and the debug level.
Configure the DLT Module
For WCUs with software version earlier than 2.72.0 the DLT module have two DLT-specific settings, one for the daemon address and one for the daemon port. Have a look here.
For WCUs with software version 2.72.0 or later, the daemon addresses and ports (several daemons are supported from this version) are instead specified when creating a Diagnostic Log and Trace (DLT) task. The only thing specified in the module is the debug level - the level of logging from the WCU regarding its handling of this task.
Configure the DoIP Module
In figure "Settings for the DoIP module" the configuration for the DoIP module is presented.
Proxy address: The proxy address for the DoIP module.
Proxy port: The proxy port.
ID: The ID of the DoIP module.
Active session: Checkbox to let the DoIP module start announcing an ongoing synchronous diagnostic session. This is typically done by setting a LED on the WCU connected to the vehicle, signaling that a synchronous diagnostic session is ongoing.
The Proxy address should usually be set to the localhost IP address 127.0.0.1 for technical reasons (it will be tunneled) and the proxy port number should usually be 6757. The ID is a textual string that identifies a particular user group that will gain access to the WCUs by configuring the client interface system with the same identifier. (This configuration is done at doipc install time.) All WCUs configured with the same ID will be reachable through the same client system interface. For more information see Remote Diagnostics over IP (DoIP).

Configure the ETAS Module
In Figure "Settings for the ETAS module" the configuration panel for the ETAS module is presented.

This panel can be used to change the username and password as well as the debug level.
Configure the Ethernet capture module

The only available setting here is debug level.
Configure the File fetcher module
The only available setting here is debug level.
Configure the GPS Module

There are four settings involved:
- Enable GPS. Sets whether the GPS should be enabled or not. If you disable the GPS all the other settings will also be disabled.
- GPS sampling interval. Sets the position sampling interval in seconds.
- GPS monitor enabled. If this setting is enabled the WCU will continuously send its GPS position to the portal enabling real-time monitoring of the whereabouts of the WCU.
- GPS monitor interval. Set how often the position will be updated. The interval is in seconds.
Configure the IDC Module
The IDC module can be configured with which CAN bus to communicate with the vehicle. You can actually even choose both where it will first try the Ethernet network (ETH), if it exists, and the CAN bus. If the car type in question does not have an Ethernet network, only the CAN option will appear.

From version 2.68.0 another option also exists where the file output format can be set.
Configure the IPEmotion RT Module
The IPEmotion RT module can be configured with SFTP port, username and password.
Configure the LPD Module
The LPD module can be configured with a list of usernames. Each "Username" field represents one username in that list. Use the button next to the field to add another username.
Configure the M-log Module

From version 2.75.0 of the M-log module there are two more fields present. They are "Current firmware" which is the last known firmware for the M-log logger. "Desired firmware" consists of a drop-down list a out-of-band firmware files present on the portal. Select one the files and the WCU will try to apply the firmware upgrade to the M-log as soon as possible.
Configure the MCD-Hub Module
The MCD-Hub module is deprecated and should not be used anymore. The configuration for the MCD-Hub has only two settings. The first is the MCD-Hubs IP address and the second is is “MCD-Hub firmware version” which shows the current version used by the hub. The other two configuration settings are the preferred firmware version and the second is “Last configuration update date” which states when the MCD-Hubs current configuration was brought into action. When you are done with your configuration you save it by pressing the “Save” button. If you for any reason need to reload the configuration, press the “Reload” button.
Configure the MQTT Module
The available settings for the MQTT Module is presented in Figure "Settings for the MQTT module".

This panel can be used to define an alternative host for the MQTT broker. Default is, as displayed in the illustration, localhost. Here you can also change the debug level for the module.
Configure the RP Module
For this module it is only possible to configure modify the debug level, see Figure "Settings for the RP module".
More information on how to use the RP module is found in the WICE RP Manual and the WICE RP How-To.
Configure the Signal Reader Module

As of version 2.33 of the WCU software it is possible to monitor signals in real time. For this to happen you must enable the feature by checking the box “Enable monitor” illustrated in Figure "Settings for the Signal Reader module". The monitoring can either be set as asynchronous or synchronous. In the former case, there is a regular signal communication with the portal and in the latter case with a specified destination port. For the synchronous case it is also possible to specify which transport protocol to use: TCP or UDP. The monitoring rate for both cases is set using the "Interval" field, where the default is once per second.
Also here it is possible to define the debug level. Further, the module settings include selecting whether or not the MDF files are to be written upon recorder stop and the version of the generated MDF file. In the sampling section there are two main choices; whether or not to record samples on change and enabling/disabling of piecewise linear approximation (PLA). If samples are to be recorded on change, it is possible to also choose to include one sample before the change. With the choice of PLA comes the option of defining the error percentage for the signal range and the maximum segment length in number of samples.
Thereafter you can select whether to aggregate ReadDataByIdentifier (service 22) diagnostic requests and which channel that should be used as the default diagnostics channel. Default interface can be CAN or DoIP and will affect the assignment that has the interface "Default Channel" selected and also the DREC. It is also possible to enter appropriate values for the diagnostics timeout. The timeout values determine how long time to wait for diagnostic responses before assuming that there are none. Typically, the timeout for sequence file diagnostics is set to a higher value due to the fact that it doesn't negatively impact the update frequency of active (diagnostics) signals.
From version 2.88.0 it is possible to select the MDF4 format when logging frames.
Configure the SmartEye Module
The configuration for this module is identical to that of the RP module, depicted in Figure "Settings for the RP module".
Configure the Soft-Hub
As for the RP and Smarteye module, its only editable parameter is the debug level using a panel as displayed in Figure "Settings for the RP module".
Configure the State of Health Module
The state of health module has the same settings as the IDC module above.
Configure the Software Download Module
The SWDL module has the same settings as the IDC module above apart from one difference highlighted in red in Figure "Settings for the Software Download Module".

For WCUs of version 2.53 and forward it is possible to allow updates to be performed without manual interaction by checking the high-lighted checkbox. If this option is chosen, the updates will instead be performed as soon as possible.
Configure the Uptime Module
This module is used to report how much and how long the WCU is running and its configuration is set using the panel displayed in Figure "Settings for the Uptime Module".

First of all you can enable/disable the functionality all together with the “Enabled” checkbox. Next is how often the up-time should be logged in seconds. The second check box, “Monitor enabled” is used when you would like the module to report its up-time in real-time and the interval for that, also in seconds.
Configure the Video Module
A description of how to configure the video module can be found here. An explanation of the module in more general terms is found in the WICE video section.
The video module can be configured both regarding the recording and the monitoring. The recording parameters refers to what is recorded on the WCU to disc to be uploaded, whereas the monitoring parameters refer to the live video that is streamed from the WCU.
The available recording settings are:
- Width, which is the width in pixels of the recorded video.
- Height, which is the height in pixels of the recorded video.
- Frame rate, which is the number of video frames per second to be recorded.
- Codec, which is the video codec used when recording video clips to disc. Avaliable codecs are JPEG and VP8. (Note that the video that is uploaded to the portal is typically transcoded to MPEG-4 format, and codec only refers to the recording phase in the WCU.)
- Clip size, which is the size in seconds or bytes of clips recorded on the WCU. The clips are subsequently concatenated on the Portal, if needed.
- Clip unit, which is the unit for the clip size setting (bytes or seconds).
The available monitoring settings are:
- Enable monitoring, which enables or disables monitoring of video.
- Width, which is the width in pixels of the monitored video.
- Height, which is the height in pixels of the monitored video.
- Frame rate, which is the number of video frames per second to be recorded.
- Codec, which is the video codec used when streaming monitored video. Avaliable codecs are JPEG and VP8.
- Destination IP address, which is the IP address to which monitored video is transmitted.
There is also a setting for rotating the video, to be used if the camera is installed upside-down or at a 45 degree angle.
Configure the Vinreader Module

The method of reading a vehicle's VIN (Vehicle Identification Number) can be set to SPA29, OBD2, SPA11, BP, TEA2+, UDS, DoIP or FIXED. The preferred setting for this is OBD2, whereby a standardized OBD-II diagnostic service is used to read out the VIN. SPA29 and SPA11 refers to using CAN diagnostic requests using either 29 bit or 11 bit SPA addressing respectively. The CAN channel (on the WCU) is selected in 'Default CAN channel'.
When the setting FIXED is used, the VIN will not be read out from the vehicle using a diagnostic service, but rather a preset value entered in the item named 'Fixed VIN' is used.


'Save VIN' is a checkbox for save vin. As default the box is checked which means that it will save the VIN number if the WCU can successfully read it. If the 'Save VIN' is unchecked then the WCU will try to read the VIN number every time it boots.
There are currently two ways of identifying a vehicle, either by reading the VIN or the chassis number. The selection is shown in Illustration 'Vehicle ID method type' to the right. When using 'Chassis NO' as identification type you must select which valued label to use for this mechanism. If no such label has been selected, you will see the the text 'No label selected in backend' to the right of the selected type, see Illustration 'No identifying label selected' on the right. To select which label to use, head over to the label administration tab to make the selection.
The Administration Tab
This tab is a collection of the administrative tasks available in the portal. These are “Connect car to WCU”, “Archives”, “GDS/SDDB file”, “Resource Groups”, “Users”, "Labels", "WCU Status" and "Key Figures".
The Connect Car to WCU Tab
To archive which vehicle a specific WCU was in at the time a task was run can be done by connecting a vehicle to a WCU in this tab. This is usually done automatically but in some situations it is necessary to do this manually
The area is divided into two tables, one for searching WCUs, the left one, and one for searching vehicles, the right one. When you start typing the name of the WCU you are looking for in the upper left corner just above the table, matching WCUs appear in the left table. To find the vehicle you are looking for, you do the same in the right table but here you have the option of using either the VIN or plate number.
To connect a WCU with a vehicle you drag the WCU you would like to connect onto the vehicle in the right table. When you drop it onto a car a small icon will show signifying that the WCU and vehicle are connected.
From version 2.42 it is also possible to select a WCU and a Car and then click on the new "Connect" button located between the two grids.
To disconnect a WCU and car you simply press the icon for wither of the WCU or car. See Figure "Connect Cars to WCU" for an example.

The connection is a sort of instantaneous carbon copy of the situation at the time that a task was created. If you later change the connection, already running/run tasks will not be affected.
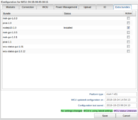
The Resource Groups Tab
This tab is used to administer some parts of the creation and destruction of resource groups and more. The panel for administering the resource groups is depicted in the Figure "Resource Group Tab".

At the top is a search field to search for resource groups. Next are two tables, side by side. The left table lists the resource groups found depending on your search criteria. When a resource group is selected, the resources that are part of the resource group are shown in the right table. Next, the functionality of the buttons will be covered.
Add and Remove Resource Groups

To add a resource group you simply press the “New resource group” button and the following window will show. Here you can type the name for the new resource group, set the resource group as strict (see Strict Resource Groups) and, if you choose to set the resource group as strict, set what platform type and platform subtype it should have. When you feel satisfied with your selections press “Create” to create the resource group. If you change your mind, press the “Cancel” button. Resource groups are global and writable and that means that names must be unique. The reason for this is that a resource group name takes on the form as both the resources car and WCU and those must be unique and therefore the resource groups must also be unique. One can, however, imagine situations where this must not be enforced but at the moment this is the case.
To remove a resource group, press the “Remove resource group” button. Be aware that no warning is given if there are resources in the group when removing it.
Default labels
Default labels are a group of labels that will be connected to WCU or/and vehicle when wcu joins the resource group. These labels will not affect current WCU/Vehicle in the resource group. To edit the set of labels press the “Edit default labels” button. New window will show. Read more about the edit default labels window here.
Approved Assignments
You can require that assignments must have been reviewed and approved before they can be applied to a resource group by checking the box "Require Approved Assignments". If an assignment does not meet these criteria, the assignment will not be applied to the resource group. Read more about the assignment review process here.
Manipulating Resources in a Resource Group
In the right hand table in Figure "Manipulating Resources in Resource Group", you see a set of resources for a resource group.

Here are both WCUs and cars part of the group. In addition to the type there is a column named “Status”. That column only applies to WCUs. The use of this column is as follows. Assume you have a resource group consisting of 50 WCUs. Further, lets make a configuration change to that resource group. Depending on where the WCUs geographically are and how they are used the WCUs will be updated at different times. How do you you know when all WCUs are up to date in the resource group? You could check them individually in the “Vehicles” panel but that is not very elegant and time saving. Instead, just watch the “Status” column for the WCUs. When a WCU is up to date with respect to the group configuration the color in the column will be green. The value is updated each 30 seconds.
The different color values are:
Red
The WCU's configuration was edited after the resource group's configuration was saved. The WCU will never use the resource group's configuration.
Yellow
The WCU's configuration is the same as the resource group's but the WCU has not yet updated to this configuration.
Green
The WCU has updated to the resource group's configuration.
You can remove individual resources from a group by selecting the resource and then press the “Remove resource” button.
Yet another button remains and it is the button “Base Group on Resource”. When you add a WCU to a resource group in the “Vehicles” panel you have the option of not updating the WCU configuration to match the one of the resource group's, see Figure "Dialog: WCU Moved to Another Resource Group" in #Resource Groups. Using this function it is possible to base the whole group on a WCU's configuration rather than the group's configuration.
The Vehicle Profiles Tab
This tab is further described here.
The Alarm Tab
This tab is further described here.
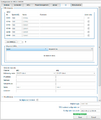
The User Tab
 The basic layout of the areas is just the same here as before. At the top you have a search area, in the middle is a result are and at the bottom are a set of buttons. The tab with a set of example users is in the Figure "User Administration Tab".
The nine columns are:
The basic layout of the areas is just the same here as before. At the top you have a search area, in the middle is a result are and at the bottom are a set of buttons. The tab with a set of example users is in the Figure "User Administration Tab".
The nine columns are:
- User ID. The unique ID that the user must enter when logging in.
- Name. The name of the user.
- Roles. Depending on which roles the user has to, he/she have different privileges. The roles are non-overlapping, i.e. being an “Admin” does not necessarily mean that you can do everything a “User” can do.
- Enabled. Tells whether the account is enabled or not.
- Email Address. By registering an email address a user can receive notifications via email from a WCU when certain event occurs.
- Last login date. The date when the user last logged in.
- Two factor auth. Whether the two-factor authentication is turned on for a particular user.
- Logged in. You can see if the user is currently logged in.
- Creation Date. The date of when the user was created. Only visible on users created after December 3 2020.
At the bottom there are eight buttons. They are:
- The “New” button brings up the “New User” dialog which adds a new user to the portal
- The “Edit” button brings up the “Edit User” dialog
- The “Change Password” button brings up a dialog to change a user's password.
- The “Create new secret” button. Pressing this generates a new cryptographic salt to be used when generating one-time passwords. If you do this for a user without enabling the possibility to see the secret on the next login, renders the user unable to login to the portal. No dialog is opened, simply a message saying that a new one has been generated is shown.
- The “Show secret” button. Shows a dialog with the cryptographic salt shown in clear text as well as the QR-code, more on this later.
- Edit roles and permissions
- The “Save headers” button. Saves the headers and their order to be used as default on later logins.
- Video. Start a video conversations with another user of the portal. You must have the software “Confero” installed for this to work.
The New User Dialog
By pressing the “New User” button the dialog appears as presented in Figure "New User Dialog". Mandatory fields are User ID and the two password fields. Remember that the User ID must be unique and you will be notified if it is not. Add the roles that you want the user to have by moving roles from the left list to the right. You can hover each role to view more information about them. Click the “Add” button to add the user or change you mind by clicking “Cancel”. If you click "Add" and the roles you have selected gives the user access to some wcus tasks, you will also be prompted about giving the user access to currently running tasks on these wcus as well. This can also be done when editing the roles of a user.
Once the new user has been created, that user is granted a default minimalistic view in both the Tasks- and Vehicles-panel. This mechanism exists to prevent new users from being overwhelmed by the large amount of columns available in these panels. Instead, they are only presented with the most important columns, with the option to see more columns if they want to. The default columns for new users are:
- Tasks panel
- Task ID
- Assignment name
- Assignment type
- WCU ID
- Status
- Task creator
- Creation date
- Resource group
- Vehicles panel
- WCU ID
- VIN
- WCU comment
- WCU software version
- WCU connection time
- Resource group
- Active alarms


The Edit User Dialog
You can at any time modify a user by pressing the “Modify” button to bring up the dialog in Figure "Modify User Dialog". The User ID cannot be changed. A disabled account can not be used for logging onto the portal even if the correct user name and password are given. To modify the user roles, select or deselect a role by using the check boxes. To turn on two-factor authentication for a user, check the appropriate box. When you are satisfied with your modifications, press the “Save” button to make them permanent on the portal or press the “Cancel” button if you change your mind.
To enable two factor authentication, tick the check box “Enable two factor authentication”. This will force the user to add another special one time password in addition to the account password when logging into the portal. The one time password is generated by a program on either your computer or if you want to you can install it on your smart phone which is probably the best solution. The program that generates one time password is based on a cryptographic salt and the current time. The cryptographic salt is randomly generated by the portal and is individual for each user. A secret can at any time be regenerated for a user which will render the user unable to login if you do not tick the check box “Show the secret to the user on their next login”. Advice the user to install "Google Authenticator" on their phone before they login to the portal for the first time as the secret will only be shown once and must be installed in the authenticator app at that time.
Just like when adding a new user, you can give or remove roles to the user by clicking "Edit user roles" and moving roles from the left list to the right and vice versa. If you edit the user roles to add some wcu task permission to the user, you will also here be prompted about giving the user access to currently running tasks on these wcus as well.

The Change Password Dialog
To change a user's password, press the “Change Password” button and the dialog below will appear. It is pretty straightforward as you type in the new password in the “New password” entry and you need to confirm it by typing it again in the entry below it. If you are satisfied, click the “Change” button or the “Cancel” button if you decide not to change the password.

The Show Secret Window

A QR-code is shown that can be transferred to a smart phone by simply starting the authenticator app (we recommend using "Google Authenticator"), point it at the screen and let the phone read the QR-code. An example of such a QR-code can be seen in Figure "QR-code Window". If the application that is to be used as a password generator do not support QR codes, the secret is shown in clear text at the top.
Edit User Roles and Permissions
Here it is also possible to edit user roles and permissions, read further instructions here.
The Labels Tab
This tab is used to administer labels. Here you can enable/disable labels, rename labels which are not system labels and it is possible to make private labels global. If the feature is enabled at your site, it is also possible to configure label announcements here.
More about these functions can be found in Administer Labels.
The WCU Status Tab
From version 2.47 the WCU status tab has changed. See WCU Status.
The Following applies to portal version 2.46 and older:
This view is supposed to be used for supervising a set of vehicles. The supervision is done in real time and the values for the set of vehicles are updated as soon as they arrive on the server from the different vehicles.
The set of status information collected comprises three parts:
General information:
- Alive, a heart beat signal
- Connectivity, what data rates are currently available to the vehicle.
- 4G
- 3G
- 2G
- none
- Cell Signal Quality (CSQ). Indicates the signal strength of the mobile modem. The values are between 0 – 31, the higher the value the better. The special value of 99 is designated an unknown or not even detectable signal.
- GPS, simply a binary indicator of fix or no fix for the GPS.
Data Storage Usage:
This set of data informs how much collected data resides in the WCU for each type of data collector (module). Total data indicates how much of the total amount of data storage available is used. After that, each type of data collector is lined up.
Data Collection Status:
When modules collect data they go through a set of states when triggers starts, stops and other events occur. Currently, only such events for the signal reader module is available. An optional message accompanying the current state is shown in parenthesis.
The screen is divided in two parts, on the left hand side is a table with search functionality for finding the vehicles of interest and on the right hand side is the monitored vehicles. To monitor a vehicles you search for it in the table and then drag and drop the vehicle on the right hand panel.
A view of the panel is depicted in the Figure "WCU Status Tab".

The Key Figures Tab
In this tab it is possible to view charts over recorded statistics for the portal. More about this option is found under Key Figures.