Difference between revisions of "View Vehicle Dialog"
| Line 1: | Line 1: | ||
[[File:Screenshot-view-vehicle-20211222.png|alt=View Vehicle Dialog|thumb|View Vehicle Dialog]] | This dialog is reached through the button "View Vehicle" in [[Tasks Tab]]. It shows the information about a vehicle associated with the selected task at the time of when the task was created.[[File:Screenshot-view-vehicle-20211222.png|alt=View Vehicle Dialog|thumb|View Vehicle Dialog]] | ||
The Portal keeps track of changes made to vehicles. Changes can be changing an attribute like plate number, adding or changing a label. This creates a history in time of the changes made to the vehicle. This dialog shows what the vehicle looked like at the time that a task was created. What the dialog looks like can be seen on the right hand side. | The Portal keeps track of changes made to vehicles. Changes can be changing an attribute like plate number, adding or changing a label. This creates a history in time of the changes made to the vehicle. This dialog shows what the vehicle looked like at the time that a task was created. What the dialog looks like can be seen on the right hand side. | ||
Latest revision as of 09:02, 27 December 2021
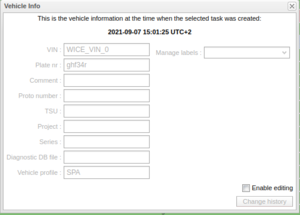
This dialog is reached through the button "View Vehicle" in Tasks Tab. It shows the information about a vehicle associated with the selected task at the time of when the task was created.
The Portal keeps track of changes made to vehicles. Changes can be changing an attribute like plate number, adding or changing a label. This creates a history in time of the changes made to the vehicle. This dialog shows what the vehicle looked like at the time that a task was created. What the dialog looks like can be seen on the right hand side.
Normally, you just use this to see what the vehicle looked like at the time. However, there are occasions where you might need to manipulate the history a bit. In order to do so, just tick the box 'Enable editing'. You will be presented with a explanation of what it means of what you are about to do. This is not the place edit the current vehicle, that should be done from the Vehicles Panel.
When you are done with your editing, press the button 'Change history' and the specific vehicle in time will be changed. Note that you will overwrite the current historical vehicle with your changes,
