Difference between revisions of "Vehicle templates"
| Line 1: | Line 1: | ||
[[File:EditVehicle.png|link=https://wiki.alkit.se/wice290/index.php/File:EditVehicle.png|thumb|Access vehicle templates]] | [[File:EditVehicle.png|link=https://wiki.alkit.se/wice290/index.php/File:EditVehicle.png|thumb|Access vehicle templates]] | ||
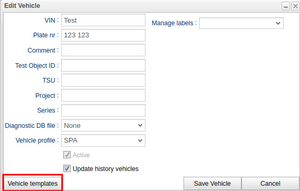
A vehicle template provides a set of | A vehicle template provides a set of preset values, templates, that streamline the process of configuring a vehicle. Access this template through the 'Edit Vehicle' and 'Add Vehicle' buttons in the Vehicles tab of the portal. As there might be any number of defined templates, the user can associate labels with the different vehicle templates in order to make them more accessible and searchable. | ||
== Vehicle template window == | == Vehicle template window == | ||
In the template window, you'll find dedicated columns for vehicles, clearly labeled under the 'Vehicle' header. These column values are applied directly to the vehicle when the template is applied. Additionally, a dynamic 'Labels' header appears when adding a template with labels, automatically updating as the user modifies the template.[[File:VehicleTemplateWindow.png|none|thumb|Vehicle template window]]The template window contains several different functions, including: | In the template window, you'll find dedicated columns for vehicles, clearly labeled under the 'Vehicle' header. These column values are applied directly to the vehicle when the template is applied. Additionally, a dynamic 'Labels' header appears when adding a template with labels, automatically updating as the user modifies the template. | ||
The idea behind associating labels with the templates is that these labels can act as a way to know which template to use for a vehicle. Assume you have three labels created to be used with the templates, "vehicle type", "vehicle color" and "resource group". As labels support values you can assign different values to different vehicle templates. An example of this is available in the figure .. where there are three templates showing and different values have been assigned to the different labels and templates. If a user was looking for an electric vehicle in Europe, one could search for "electric" in "vehicle type" and for "EU" in the comment. By looking at the value in for the "resource group"-label the user also knows which resource group the vehicle should be added to after applying the settings.[[File:VehicleTemplateWindow.png|none|thumb|Vehicle template window]]The template window contains several different functions, including: | |||
* Add Template - This function adds a new template to the template window. | * Add Template - This function adds a new template to the template window. | ||
* Edit Template - This function allows the user to edit an existing template. A row must be selected for this button to be enabled. | * Edit Template - This function allows the user to edit an existing template. A row must be selected for this button to be enabled. | ||
* Apply Template - This function allows the user to apply the template to the vehicle. A row must be selected for this button to be enabled. | * Apply Template - This function allows the user to apply the template to the vehicle. A row must be selected for this button to be enabled. Only the "Vehicle settings" will be applied. | ||
* Remove - This button removes a selected template | * Remove - This button removes a selected template | ||
* Close - This button closes the Vehicle template window. | * Close - This button closes the Vehicle template window. | ||
Revision as of 10:59, 28 June 2024
A vehicle template provides a set of preset values, templates, that streamline the process of configuring a vehicle. Access this template through the 'Edit Vehicle' and 'Add Vehicle' buttons in the Vehicles tab of the portal. As there might be any number of defined templates, the user can associate labels with the different vehicle templates in order to make them more accessible and searchable.
Vehicle template window
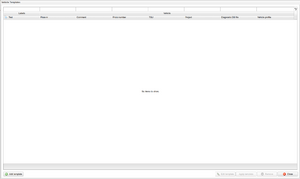
In the template window, you'll find dedicated columns for vehicles, clearly labeled under the 'Vehicle' header. These column values are applied directly to the vehicle when the template is applied. Additionally, a dynamic 'Labels' header appears when adding a template with labels, automatically updating as the user modifies the template.
The idea behind associating labels with the templates is that these labels can act as a way to know which template to use for a vehicle. Assume you have three labels created to be used with the templates, "vehicle type", "vehicle color" and "resource group". As labels support values you can assign different values to different vehicle templates. An example of this is available in the figure .. where there are three templates showing and different values have been assigned to the different labels and templates. If a user was looking for an electric vehicle in Europe, one could search for "electric" in "vehicle type" and for "EU" in the comment. By looking at the value in for the "resource group"-label the user also knows which resource group the vehicle should be added to after applying the settings.
The template window contains several different functions, including:
- Add Template - This function adds a new template to the template window.
- Edit Template - This function allows the user to edit an existing template. A row must be selected for this button to be enabled.
- Apply Template - This function allows the user to apply the template to the vehicle. A row must be selected for this button to be enabled. Only the "Vehicle settings" will be applied.
- Remove - This button removes a selected template
- Close - This button closes the Vehicle template window.

