Edit Signal reader assignments via M2M
From version 1.47.0 of the API, Signal reader assignments can be edited via the API. The currently available end points for editing a specific assignment is described at https://wice.alkit.se/m2m/resource_EditSignalReaderAssignmentService.html
Editing an assignment is done by combining results from multiple end points and to help the user the sections below describes some use cases.
Add A2L signals from updated vehicle profile
One use case is when an assignment "A" is based on a vehicle profile "VP" which has A2L files associated with at least one ECU. Then a new version of the A2L file is available which contains additional signals that needs to be measured in A.
When using the portal GUI one would start with uploading the A2L file and then associate it with the ECU of the VP. After that A needs to be copied (to use the updated version of VP) and the new A2L file needs to be selected when A is copied.
After the copying process is successful the assignment can be edited and the additional signals of the new A2L file are available when selecting the signals from the signal source.
The following sections describes how to do this via M2M.
1. Upload new A2L file
Uploading a new A2L is done via https://wice.alkit.se/m2m/resource_VehicleProfileService.html#resource_VehicleProfileService_uploadNewA2LFile_attributes_file_POST.
When using Postman the necessary information is provided as in the screenshot to the right. The only required attribute is the "ecu-name".
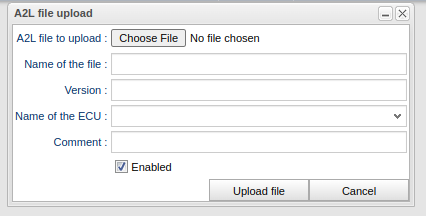
The same function via the GUI can be seen in screenshot "Upload A2L via portal".
A successful response looks like:
[
{
"type": "A2L",
"comment": "four signals",
"enabled": true,
"version": "1",
"name": "four_signals",
"id": 3,
"ecu-name": "ABC"
}
]
2. List vehicle profiles
To able to associate the new A2L file with a vehicle profile we need to obtain the ID of the vehicle profile we want to update. This is done via the end point https://wice.alkit.se/m2m/resource_VehicleProfileService.html#resource_VehicleProfileService_listProfiles_name_offset_limit_GET
A successful response to that end point may look like:
{
"count": 1,
"offset": 0,
"limit": 25,
"results": [
{
"name": "workshop-profile",
"diagnosticReferenceID": 0,
"id": 1
}
]
}
3. List ECUS of a vehicle profile
To know which ECU in the vehicle profile we want to associated the A2L file with we need to list the configured ECUs for the vehicle profile of interest. This is done via: https://wice.alkit.se/m2m/resource_VehicleProfileService.html#resource_VehicleProfileService_getEcuToA2LAssociatonSummary_profileID_GET
Here we provide the "id" of the profile obtained in the previous step.
A successful response may look like:
[
{
"ecu-name": "ABC",
"can-bus-number": 1,
"seedkey-id": 0,
"nr-of-a2l-files": 1
}
]
4. Associate A2L file with ECU
To associate the uploaded A2L file with the ECU "ABC" in the response of step 3 above the following end point is used: https://wice.alkit.se/m2m/resource_VehicleProfileService.html#resource_VehicleProfileService_addEcuA2LAssociation_profileID_toBeMade_PUT
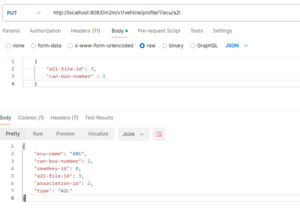
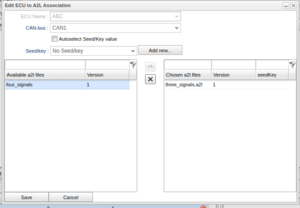
A request example with a successful response can be seen in the screenshot to the right. The ID of the uploaded A2L file from step 1 along with the CAN bus number of the ECU is provided. This is the same as when selecting the CAN bus and the A2L file when association a file with an ECU using the portal GUI. An example can also be seen in a screenshot to the right.
The successful response in this step may be:
{
"ecu-name": "ABC",
"can-bus-number": 1,
"seedkey-id": 0,
"a2l-file-id": 3,
"association-id": 2,
"type": "A2L"
}
5. List signal reader assignments
Now is the vehicle profile updated with the new A2L file and it's time to copy the assignment. To know which assignment to copy we can list the assignments via https://wice.alkit.se/m2m/resource_AssignmentService.html#resource_AssignmentService_listAssignments_type_offset_limit_GET
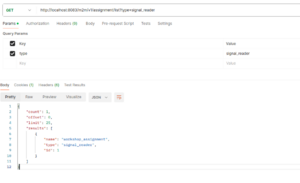
An example request can be seen in the screenshot to the right. An example response is:
{
"count": 1,
"offset": 0,
"limit": 25,
"results": [
{
"name": "workshop_assignment",
"type": "signal_reader",
"id": 1
}
]
}
6. Copy signal reader assignment
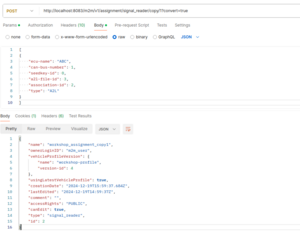
With the id of the assignment obtained in step 5 we can use the copy assignment end point to make a copy of the assignment: https://wice.alkit.se/m2m/resource_AssignmentService.html#resource_AssignmentService_copySignalReaderAssignment_id_convert_ecuToDescriptionFiles_noTimeout_POST
Since the vehicle profile the assignment is based on has changed the assignment may need to be converted. In the example to the right we provide the flag convert=true which will automatically convert the assignment to the updated vehicle profile. If not included and the assignment needs to be converted a '400 Bad request' is returned with the message telling that the assignment needs be converted. We also provide the A2L file association we got in the response in step 4.
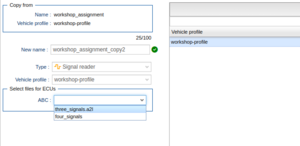
This is the same step as when selecting an A2L file in "Select files for ECUs" when copying an A2L file based assignment via the portal GUI. See screenshot. If the association is not provided, the selected signals from the A2L file source will be removed from the assignment.
7. List signal sources for assignment
With a fresh copy using the latest vehicle profile version of the original assignment we want to list the available signal sources of the assignment: https://wice.alkit.se/m2m/resource_EditSignalReaderAssignmentService.html#resource_EditSignalReaderAssignmentService_getSignalSources_id_GET
Now we are using the "Edit signal reader assignment" services and we provide the id of the assignment we want to list signal sources for.
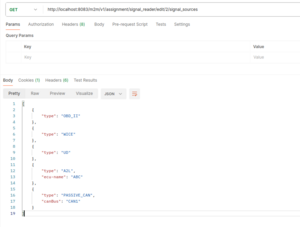
An example response looks like:
[
{
"type": "OBD_II"
},
{
"type": "WICE"
},
{
"type": "UD"
},
{
"type": "A2L",
"ecu-name": "ABC"
},
{
"type": "PASSIVE_CAN",
"canBus": "CAN1"
}
]
8. List signals for a signal source
For the A2L signal source listed in step 7 we can list the available signals for that source using: https://wice.alkit.se/m2m/resource_EditSignalReaderAssignmentService.html#resource_EditSignalReaderAssignmentService_getSignalsForSignalSource_id_source_offset_limit_POST
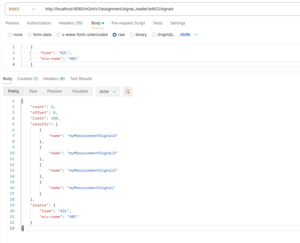
A request and response example can be seen in the screenshot to the right.
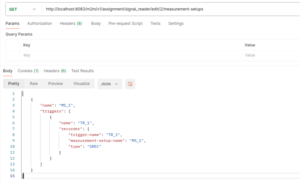
9. List measurement setups for an assignment
To add any signal from step 8 to any recorder in the assignment we first need to get the recorder we want to add the signal(s) to. This is done via: https://wice.alkit.se/m2m/resource_EditSignalReaderAssignmentService.html#resource_EditSignalReaderAssignmentService_getMeasurementSetups_id_GET
From the response in the example to the right we can extract the JSON of the recorder we want to add the signal to:
{
"trigger-name": "TR_1",
"measurement-setup-name": "MS_1",
"type": "SREC"
}
10. Add signal to SREC
To add one or multiple signals to a recorder we use: https://wice.alkit.se/m2m/resource_EditSignalReaderAssignmentService.html#resource_EditSignalReaderAssignmentService_addSRECs_id_signals_source_recorder_PUT
Here we need to provide a list of signals we want to add (step 8), the source of signals (step 7) and the recorder we want to add the signals to (step 9). An example can be seen in the screenshot to the right.

